Honda Silver Wing Scooter Forum


HomeHome  GalleryGallery  FAQFAQ  SearchSearch  RegisterRegister  Log inLog in  
Search


Display results as :
 
Rechercher Advanced Search
Latest topics
» New member from Europe
LED Flasher Installation I_icon_minitimeby zrx212 Today at 1:54 pm

» New Silverwing owner, thoughts and questions
LED Flasher Installation I_icon_minitimeby Loosemarbles Yesterday at 4:25 pm

» Will my 2002 Silverwing 600 fit in the bed of my F150 Ford with Tailgat up or down?
LED Flasher Installation I_icon_minitimeby tedebr Tue Mar 26, 2024 10:56 pm

» Is this a good price for a Silverwing 2006
LED Flasher Installation I_icon_minitimeby zrx212 Tue Mar 26, 2024 1:19 pm

» What were they thinking?
LED Flasher Installation I_icon_minitimeby MikeO Tue Mar 26, 2024 5:57 am

» Hello everyone
LED Flasher Installation I_icon_minitimeby MikeO Tue Mar 26, 2024 5:54 am

» Sidelight Bulbs
LED Flasher Installation I_icon_minitimeby Green7 Mon Mar 25, 2024 5:25 pm

» Voyager trike kit forsale
LED Flasher Installation I_icon_minitimeby Mkdelay12@gmail.com Sun Mar 24, 2024 7:41 pm

» tiny oil leak
LED Flasher Installation I_icon_minitimeby Loosemarbles Sun Mar 24, 2024 1:41 pm

» Low charging
LED Flasher Installation I_icon_minitimeby yammer Sat Mar 23, 2024 1:49 pm

Navigation
 Portal
 Index
 Memberlist
 Profile
 FAQ
 Search
free forum


 LED Flasher Installation

Go down 
+2
dekare
Easyrider
6 posters
AuthorMessage
Easyrider
Silver Wing Guru
Silver Wing Guru
Easyrider


Number of posts : 1012
Age : 73
Location : HI
Points : 4111
Registration date : 2015-12-18

LED Flasher Installation Empty
PostSubject: LED Flasher Installation   LED Flasher Installation I_icon_minitimeSat Dec 24, 2016 10:56 pm

LED Flasher Installation Boxshi13
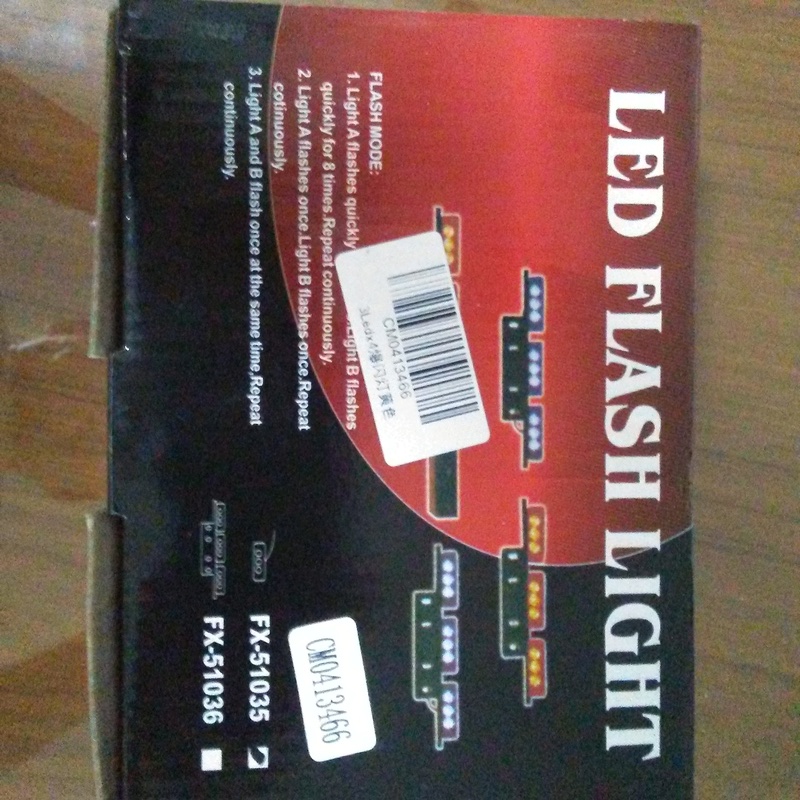
This is what the box looks like
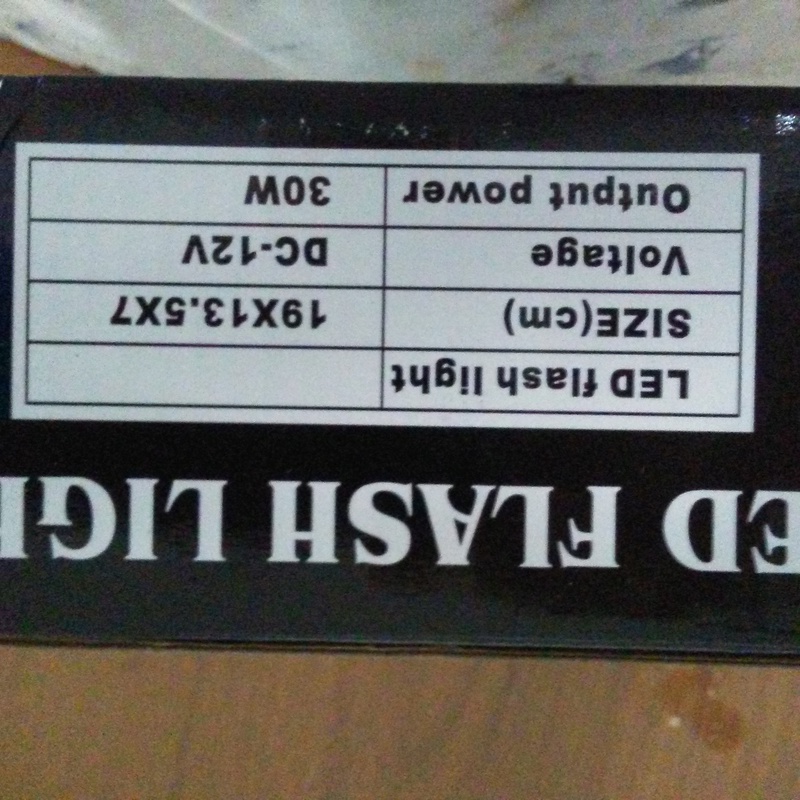
LED Flasher Installation Specs11
Specs on the box

LED Flasher Installation Removi11
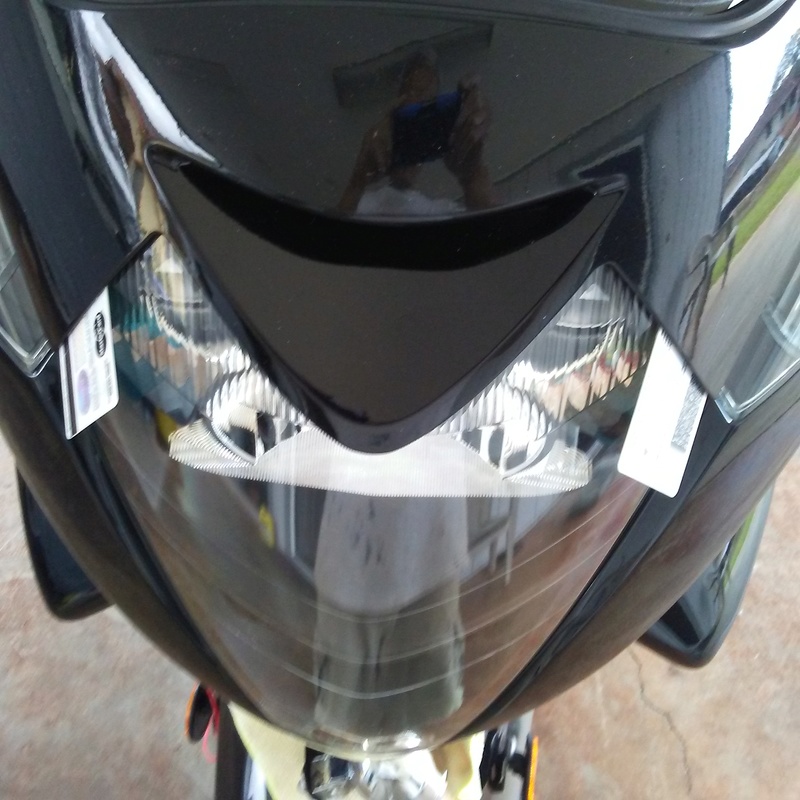
Use plastic credit cards to remove top bat wing

LED Flasher Installation Stripp10
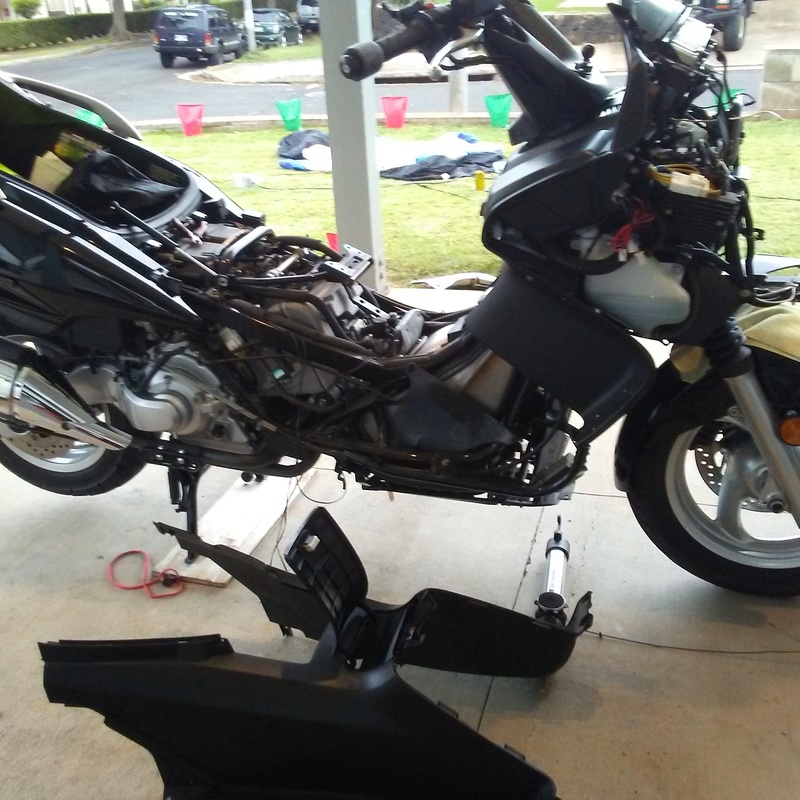
I removed windsield, front fairing, right cover, seat, and center cover to run the cables along the frame.

LED Flasher Installation Rearca10
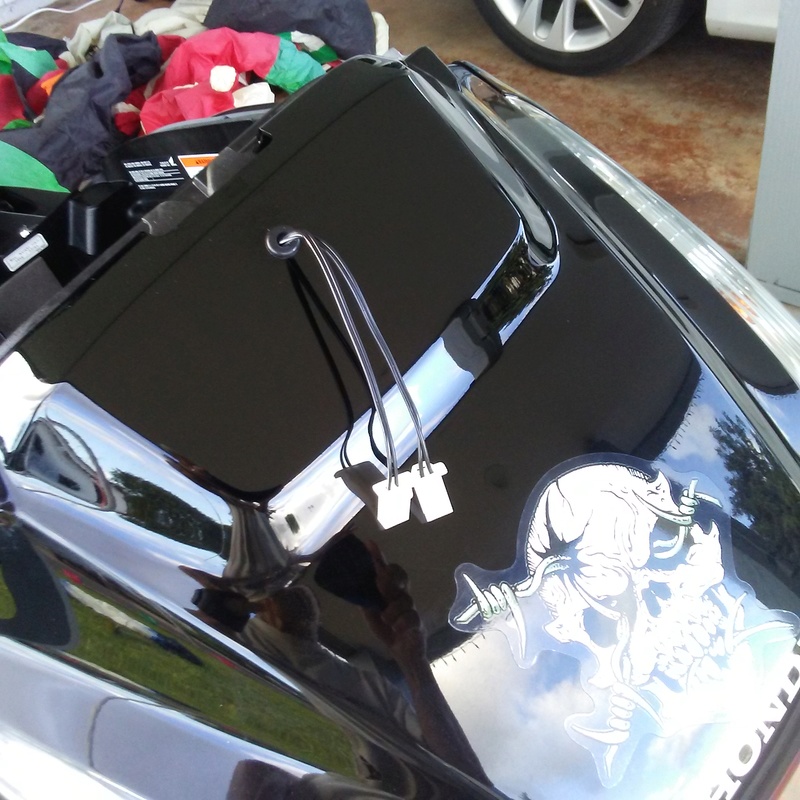
The rear cables exit from under the rear spoiler. Use gourmets to protect cable.

LED Flasher Installation Rearle10
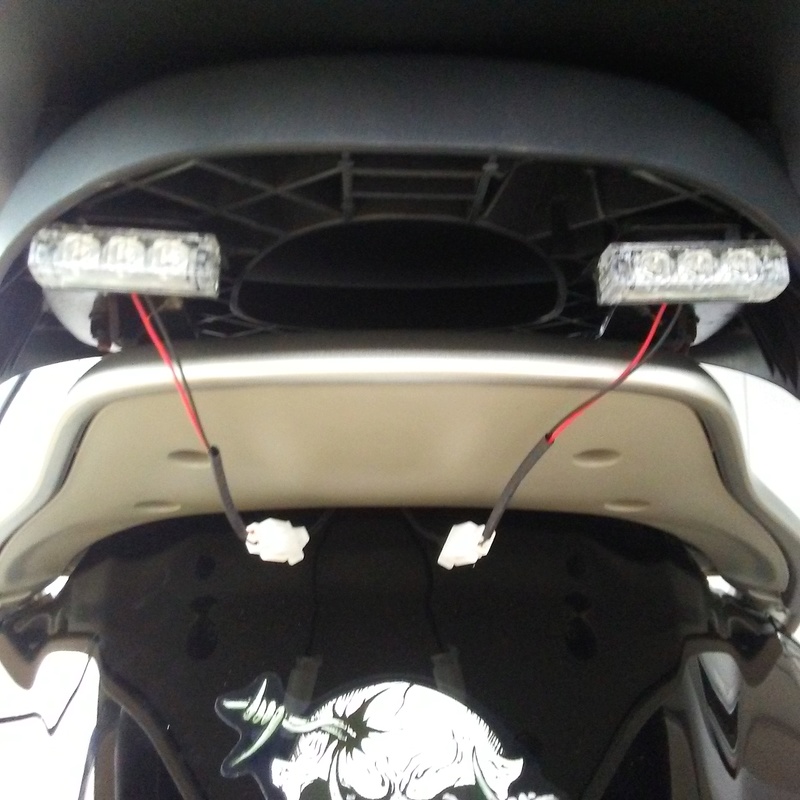
The LED lights came with right angled brackets that I used to mount to the underside of the GIVI mount.

LED Flasher Installation Rights10
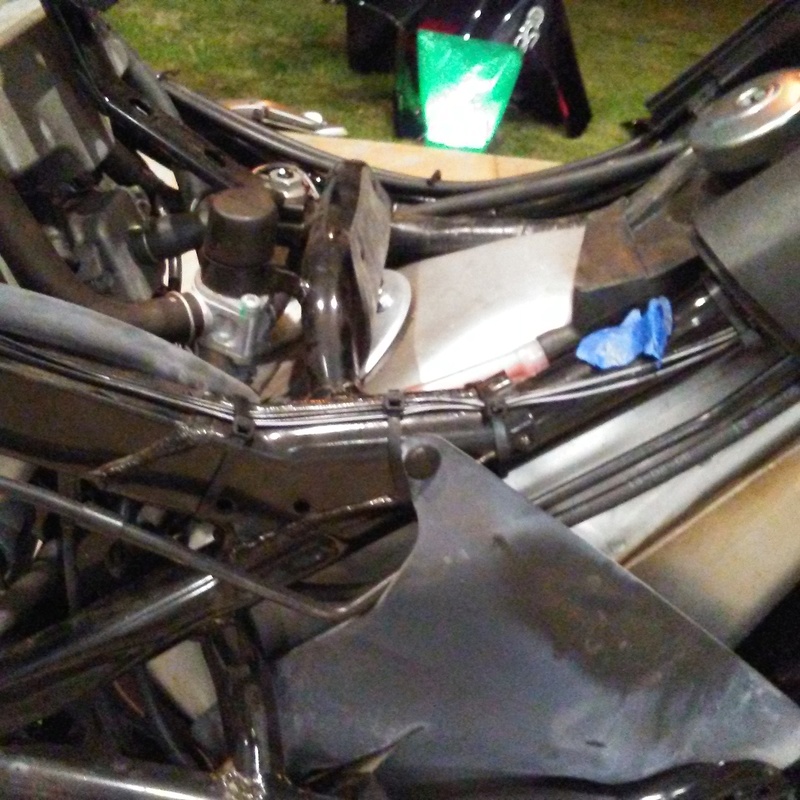
I secured the cables to the square frame pieces. Cables that came with the kit was not long enough to run it anywhere else. The blue tape indicates location of cable run. Use wire zip ties.

LED Flasher Installation Contro10
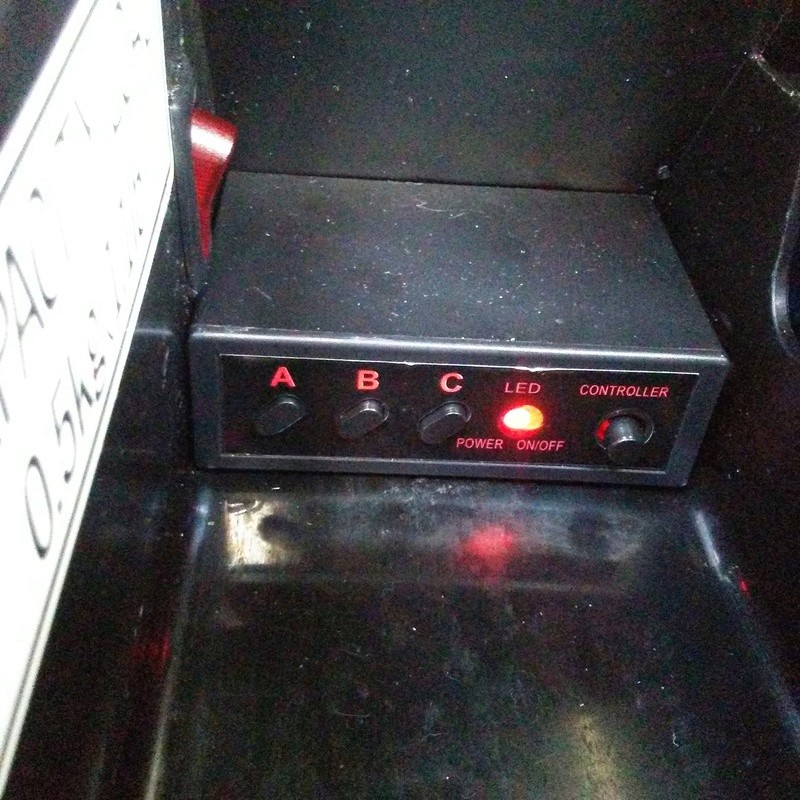
This is the controller located in the right compartment.

LED Flasher Installation Contro11
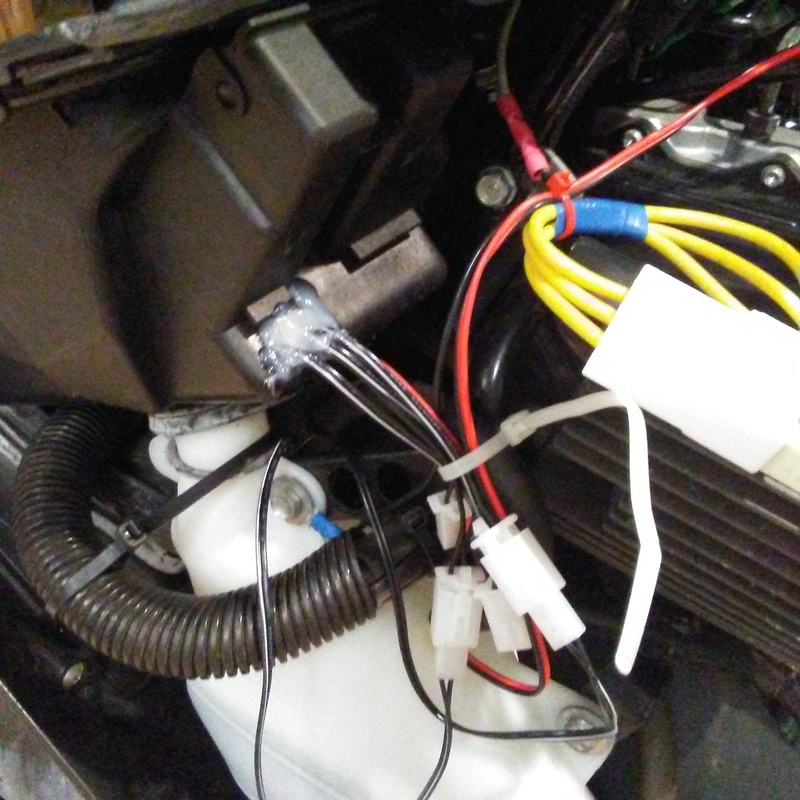
This is the controller cable connections. Leave enough cable lengths so that you can remove the right side storage box to service the anti freeze. Also use silicone sealer to seal the hole made for the cables to exit the right storage box.

LED Flasher Installation Fourwa10
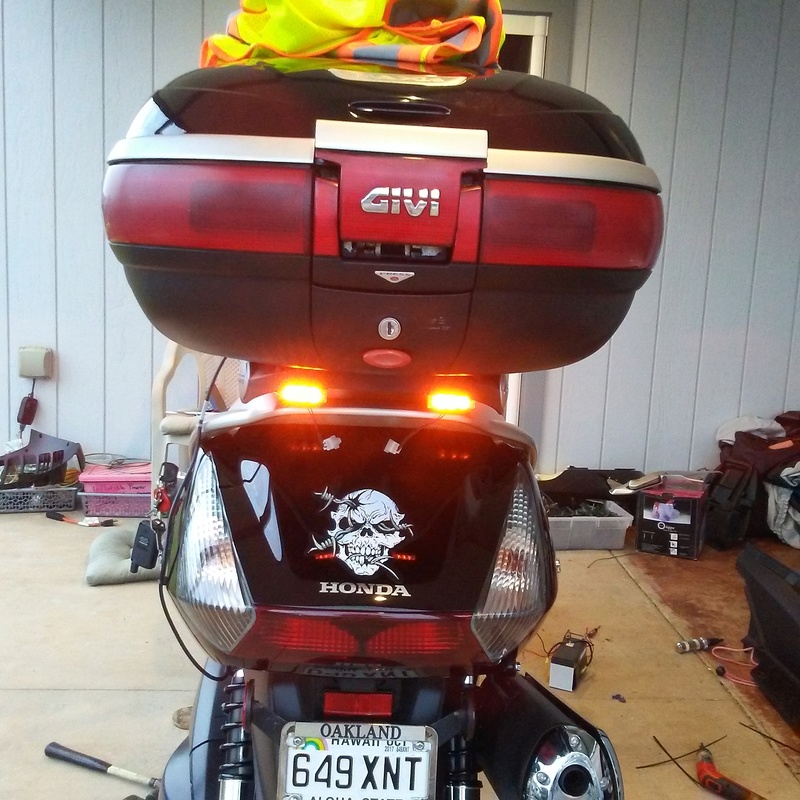
This is the picture of the rear light.

I originally had planned to modify my turn signals to become four way flashers, but I changed my mind for two reasons. 1} I liked the flashing patterns the kit provided, 2) LED should run longer on battery only than my turn signals. I do not have to be running the engine to operate the flashers.
The three patterns are: single flash wig wag, three quick flashes wig wag, and the four way flashing.

Hope I explained everything ok.
To Meldrew, and John the answer is "I just like to tinker with my toys". Acturlly DennisB also did a write up on something similar.
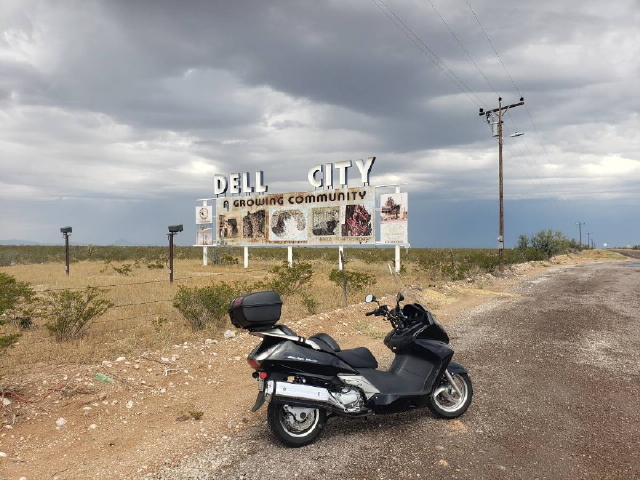
My front LED lights are mounted to Dennis's front light bar.
Back to top Go down
dekare
Maxi-Scooter Rider
Maxi-Scooter Rider
dekare


Number of posts : 125
Location : MN
Points : 2925
Registration date : 2016-08-09

LED Flasher Installation Empty
PostSubject: Re: LED Flasher Installation   LED Flasher Installation I_icon_minitimeMon Dec 26, 2016 8:05 am

What kind of job was it to remove and reinstall the plastics? Did any of it break either in removal, or reinstallation?
Back to top Go down
Easyrider
Silver Wing Guru
Silver Wing Guru
Easyrider


Number of posts : 1012
Age : 73
Location : HI
Points : 4111
Registration date : 2015-12-18

LED Flasher Installation Empty
PostSubject: Re: LED Flasher Installation   LED Flasher Installation I_icon_minitimeMon Dec 26, 2016 4:46 pm

dekare wrote:
What kind of job was it to remove and reinstall the plastics? Did any of it break either in removal, or reinstallation?

dekare,
I have removed the front, side, and lower plastics several times. I have fixed and reinforced broken tabs from my prior mods that they seem to not break anymore. I have also rebuilt a 2002 Swing after rear ending a car.
What I like about this mod is that the flashers are not dependent on the Swing's being able to run. It does use the Swing's battery. Being an LED system, it should not draw as much battery power as the OEM incondesent lights.
Back to top Go down
Mike from NS
Silver Wing Rider
Silver Wing Rider
Mike from NS


Number of posts : 461
Age : 71
Location : Nova Scotia
Points : 4357
Registration date : 2013-09-12

LED Flasher Installation Empty
PostSubject: Re: LED Flasher Installation   LED Flasher Installation I_icon_minitimeTue Dec 27, 2016 7:49 am

Looks great Easyrider!

Are the rear LEDs activated when applying the brakes or only through manual activation with the controller? A 4-way flasher arrangement is hopefully in my future. And I certainly want to install a wig-wag for the rear brake.

And where did you find the "kit"? eBay ?

Thanks,
Mike
Back to top Go down
Easyrider
Silver Wing Guru
Silver Wing Guru
Easyrider


Number of posts : 1012
Age : 73
Location : HI
Points : 4111
Registration date : 2015-12-18

LED Flasher Installation Empty
PostSubject: Re: LED Flasher Installation   LED Flasher Installation I_icon_minitimeWed Dec 28, 2016 7:14 pm

Mike from NS wrote:
Looks great Easyrider!

Are the rear LEDs activated when applying the brakes or only through manual activation with the controller?  A 4-way flasher arrangement is hopefully in my future.  And I certainly want to install a wig-wag for the rear brake.

And where did you find the "kit"?  eBay ?

Thanks,
Mike

Mike,
The LED lights are only activated using the controller. I don't need them to work off of the OEM brakes. I have something better.  Earlier I installed a system called "BackOFF XP" which I set it to flash three times then go solid when activating the brakes. I installed it in the original wiring, prior to The Perfect Connector from Dennis. This allowed the OEM lights as well as the Admore lights installed in my GIVI E55 Monokey box to flash. My wife said that it lights up like a Christmas tree when viewing from the rear.
Yes it was ordered on eBay. Search for:
Car Truck 12 LED Emergency Beacon Light Hazard Flash Strobe Warning Lamp Amber
Costs $14.85 and free shipping from China. It came a couple of weeks earlier than expected.

[Admin edit: http://www.ebay.com/itm/361812826790?_trksid=p2055119.m1438.l2649&ssPageName=STRK%3AMEBIDX%3AIT. ]
Back to top Go down
Mike from NS
Silver Wing Rider
Silver Wing Rider
Mike from NS


Number of posts : 461
Age : 71
Location : Nova Scotia
Points : 4357
Registration date : 2013-09-12

LED Flasher Installation Empty
PostSubject: Re: LED Flasher Installation   LED Flasher Installation I_icon_minitimeThu Dec 29, 2016 7:14 am

Thanks for the info Easyrider.

I really like the Back Off light. Saw one on a fire truck; and if you missed seeing the truck, you certainly notice the wig-wag of the brake lights.

The head-light modulator is another feature which should be a standard item (along with the Back Off brake light) on all bikes.

Mike
Back to top Go down
john grinsel
Curmudgeon
john grinsel


Number of posts : 3291
Age : 84
Points : 9198
Registration date : 2009-08-18

LED Flasher Installation Empty
PostSubject: Re: LED Flasher Installation   LED Flasher Installation I_icon_minitimeThu Dec 29, 2016 9:30 am

I think skillful riding much more important than bunch of flashing lites....In over 1.5 million miles of riding in Europe/US/Asia/Mexico, been rear ended once by lady on cell phone in US, who ran two stop signs and got me at the third. Just something to think about. Nothing would have stopped her.

I do wear Hi-Vis Aerostich Darien Jacket, most of the time. White Helmet, some reflective tape for night.

One short coming of SilverWing is 4-way warning lites, standard. I found them useful on my two Burgman 400's and HD's.

Back to top Go down
DennisB
Silver Wing Guru
Silver Wing Guru


Number of posts : 2778
Age : 73
Location : NE Oklahoma
Points : 8859
Registration date : 2008-12-28

LED Flasher Installation Empty
PostSubject: Re: LED Flasher Installation   LED Flasher Installation I_icon_minitimeThu Dec 29, 2016 11:13 am

Hi everyone, Making a light weight front mounting bar for the purpose of mounting emergence LED flasher lights would be very easy and no welding required.

All you would need a piece of 1.0 inch (25.4mm) wide aluminum - 1/8th inch (3.25mm) thick and 8 very small pop rivets - 4 X 1/4"grip for the cross bar mount and 4 X 1/8"grip for the LED light mounts brackets.

Caution: File (brake) all sharp edges to prevent hurting yourselves.

Cut 2 pieces 2 1/8" (5.4cm) long. Drill a 1/4" (6mm) hole a 1/2" (13mm) from end and centered at end of each ear piece (one hole per ear). These 2 holes mounts the bar to the scooter.

Bend these ear pieces to 42 degrees at center point of ear length.

Mount on scooter with ears facing forward. Then measure across to the out side of each ear (this will give you the length of the cross bar) about 10.75" (27.3cm)

Mount cross bar to the bottom surface of the ears (not the top).

Information: mounting bolts under fairing are approx. 9 13/16 to 9 7/8" (24.76cm) apart. Attach ears to a piece of wood at these points.

Now here is where it gets a little tricky. We need to drill a holes same dia. as pop rivets - Just one for now. we will add the second rivet as a bar stabilizer later). Installing one gives us a bit of wiggle room for final rivet installation. OR if you feel brave, install both on each end.

Are we having fun yet?

Remove bar assembly from wood and temporarily attach to scooter. If fit is OK remove and install other rivets. Paint your new bar black and let dry over night.

Install LED lights to cross bar with pop rivets or screws and nuts. install on scooter and attach power wires.

Now that was easy. Remember to cover your front fender with a thick towel while working on this project.

Let me know how this works for you.
Back to top Go down
Art
Super Scooter Rider
Super Scooter Rider


Number of posts : 272
Location : Garwood Tx
Points : 3298
Registration date : 2015-12-25

LED Flasher Installation Empty
PostSubject: Re: LED Flasher Installation   LED Flasher Installation I_icon_minitimeThu Dec 29, 2016 11:56 pm

Hell, I'm not even comfortable trying to make a hitch Laughing
Back to top Go down
Sponsored content


LED Flasher Installation Empty
PostSubject: Re: LED Flasher Installation   LED Flasher Installation I_icon_minitime

Back to top Go down
 
LED Flasher Installation
Back to top 
Page 1 of 1
 Similar topics
-
» IBF4 brake flasher installation question
» 4 way flasher
» Brake Light Attention Module Flasher (adjustable)
» OEM flasher bypass harness
» LED Strip Tail Lights Mod with Flasher.

Permissions in this forum:You cannot reply to topics in this forum
Honda Silver Wing Scooter Forum :: Honda Silver Wing :: Accessories & Modifications-
Jump to: