| | The official long post of the overhaul and repaint of my 06 Silverwing |  |
|
+11sonuvabug ItBeMe bikehiker Mike from NS cotetoi 2wheelgal oldwingguy Dale N. willajabir Cosmic_Jumper Gustafa 15 posters |
| Author | Message |
|---|
Gustafa
Super Scooter Rider


Number of posts : 218
Location : Cordova, TN
Points : 3482
Registration date : 2015-10-10
 |  Subject: The official long post of the overhaul and repaint of my 06 Silverwing Subject: The official long post of the overhaul and repaint of my 06 Silverwing  Wed Dec 13, 2017 5:43 pm Wed Dec 13, 2017 5:43 pm | |
| I am the third owner of this 2006 Honda Silverwing. The original owner laid it down once, leaving scratches on the lower silver undercovers under the footboards. The factory color was blue and the second owner took it upon himself to grab a can of Rustoleum Safety Yellow and brush paint the entire bike. Parts on. Splatter all over. Yes. He did that. On first glance, you cant see the brushwork, this photo even grace the cover of this website for a while: 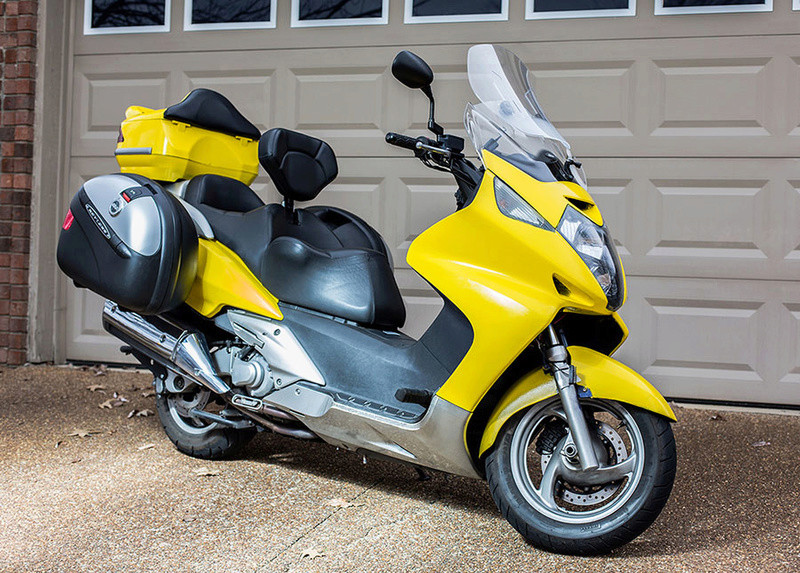 Up close however, you could see brush strokes and splotches: 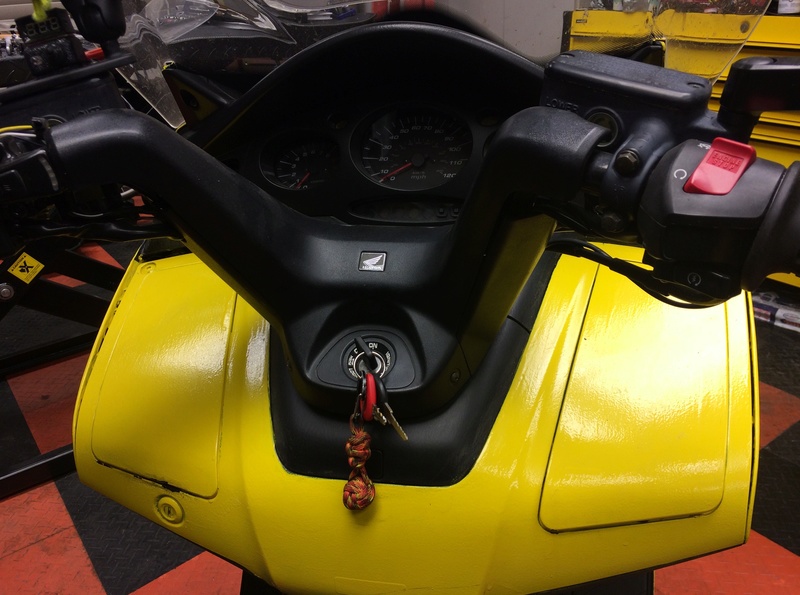  I didnt mind, I got the bike for a steal of a price that included heated grips, a custom heated Daylong seat and backrest, two Givi saddlebags and rack as well as the rear trunk and that upgraded Givi windscreen. He took great care of the bike, so in my head I knew I would be updating the color one day. I had grown to love the "hi-viz" yellow. It was different, bright, I could be seen and it drew some attention. He had completely covered up and removed all the Honda badging, but that could be easily remedied. I picked a color very similar, went with an automotive matte yellow 1-stage paint (no separate clear coat needed to be shot) and got my spray gun skills in order. I took all the body panels off and went to town. I had purchased an extra fender for like $10 brand new OEM off eBay and used the old fender to test the paint removal process. I grew up with a father who is a plastics engineer, so I knew what I was getting myself into with possibilities of melting the ABS parts (they are indeed molded ABS plastic body panels) etc. So I took my time and found some great remover that bubbled up the brushed on paint rather quickly. 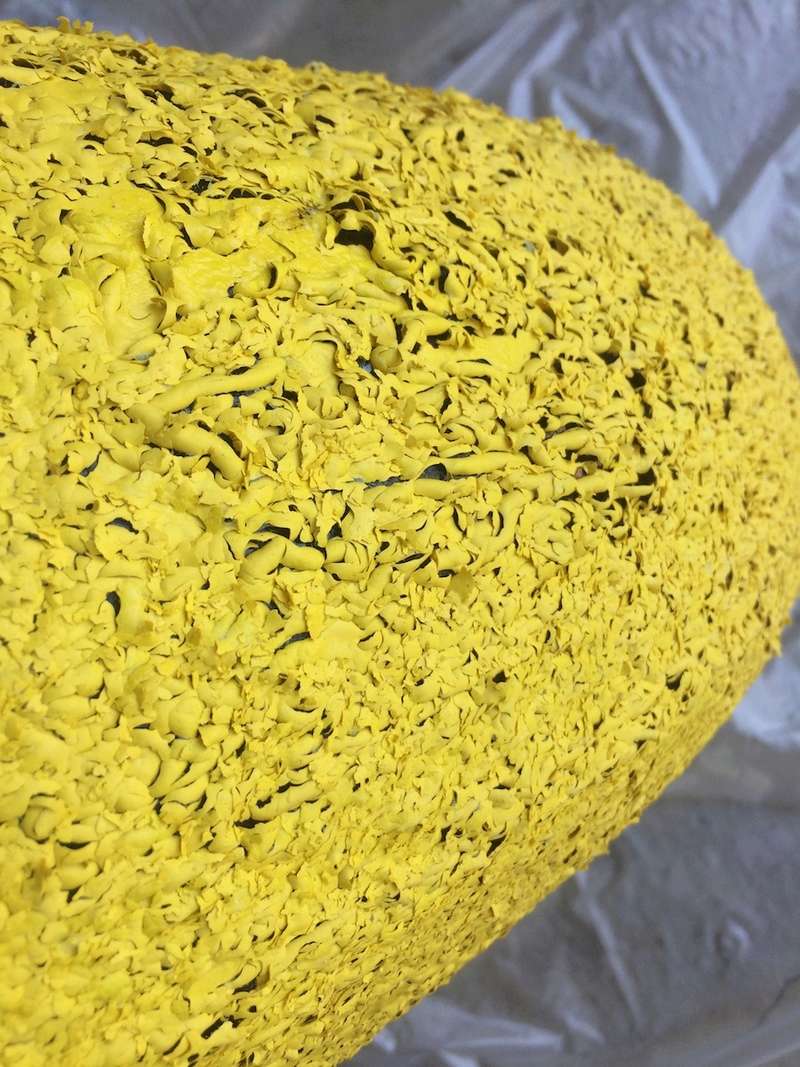 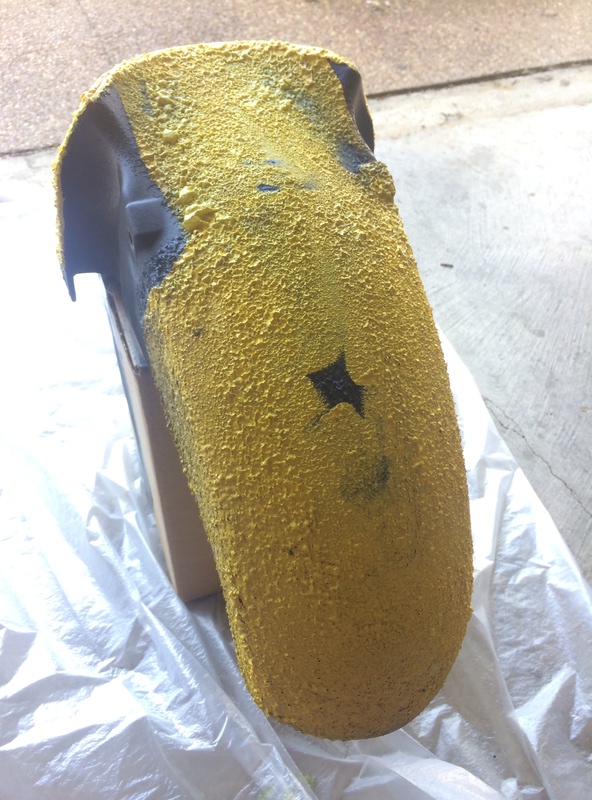 I stripped and sanded all the panels and set to the task of filling, repairing and addressing anything and everything I was comfortable with. Cracks, broken screw holders, missing mounting screws and hardware, etc. First up was the wheels. Got them off the bike and had them powder coated. The overall theme of the bike was matte yellow, graphite and gray.  After getting the panels sanded, filled if needed, primed and wet sanded... 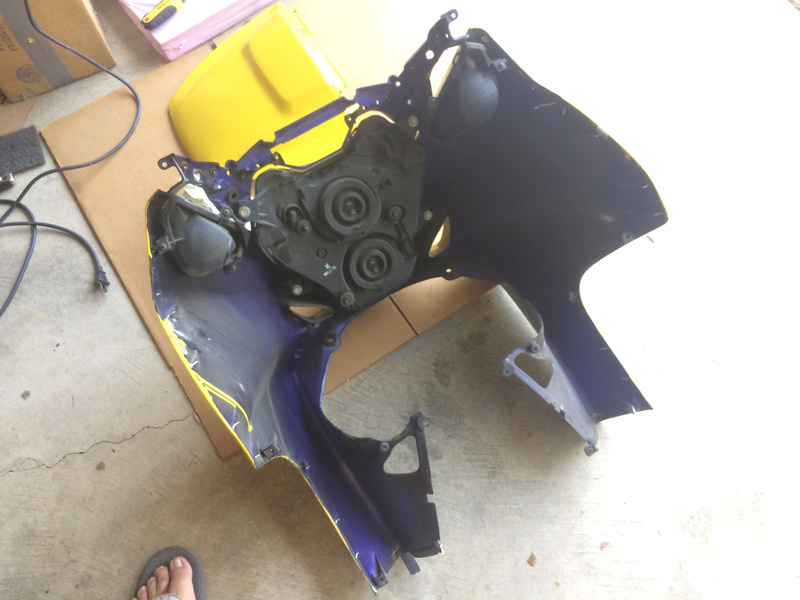 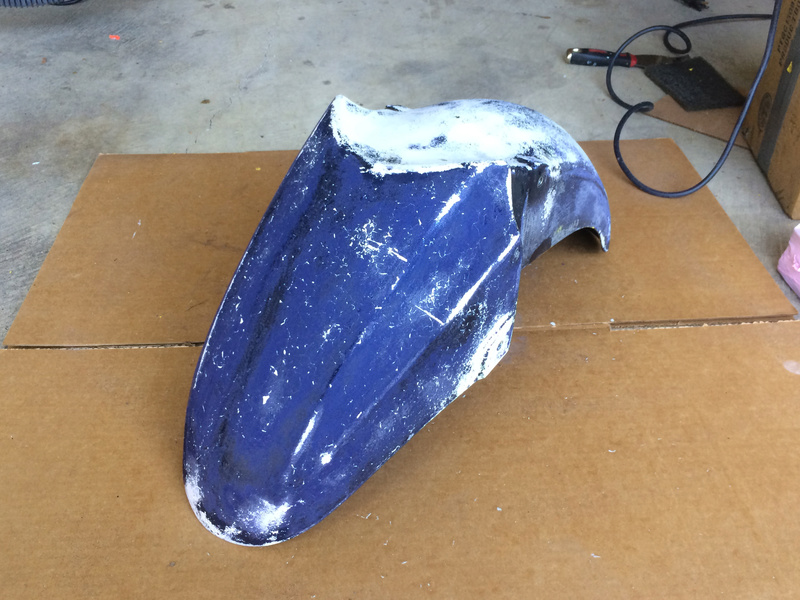 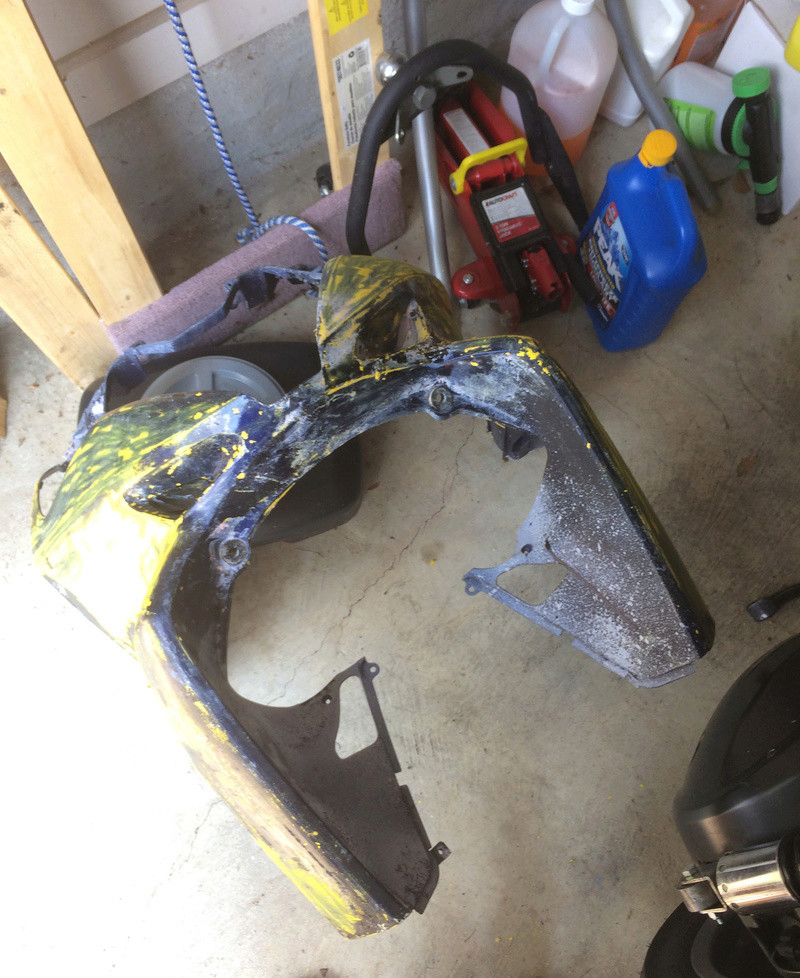 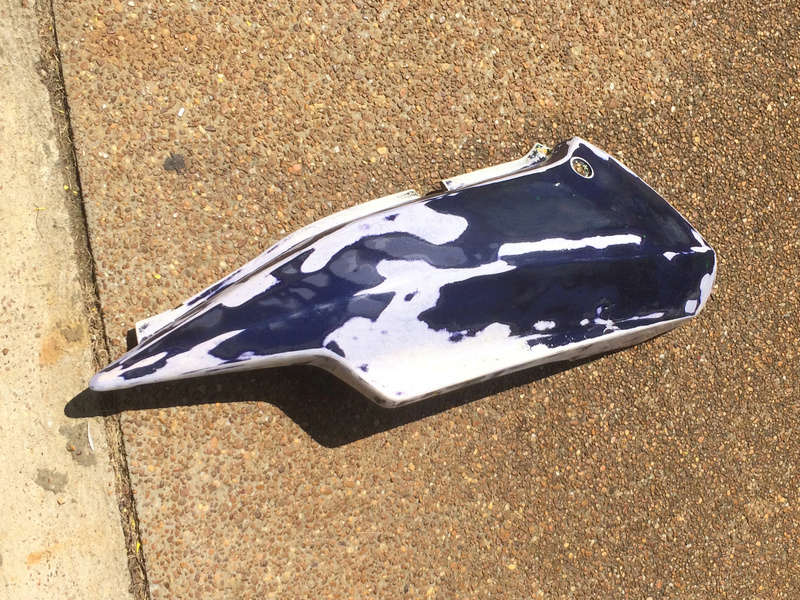 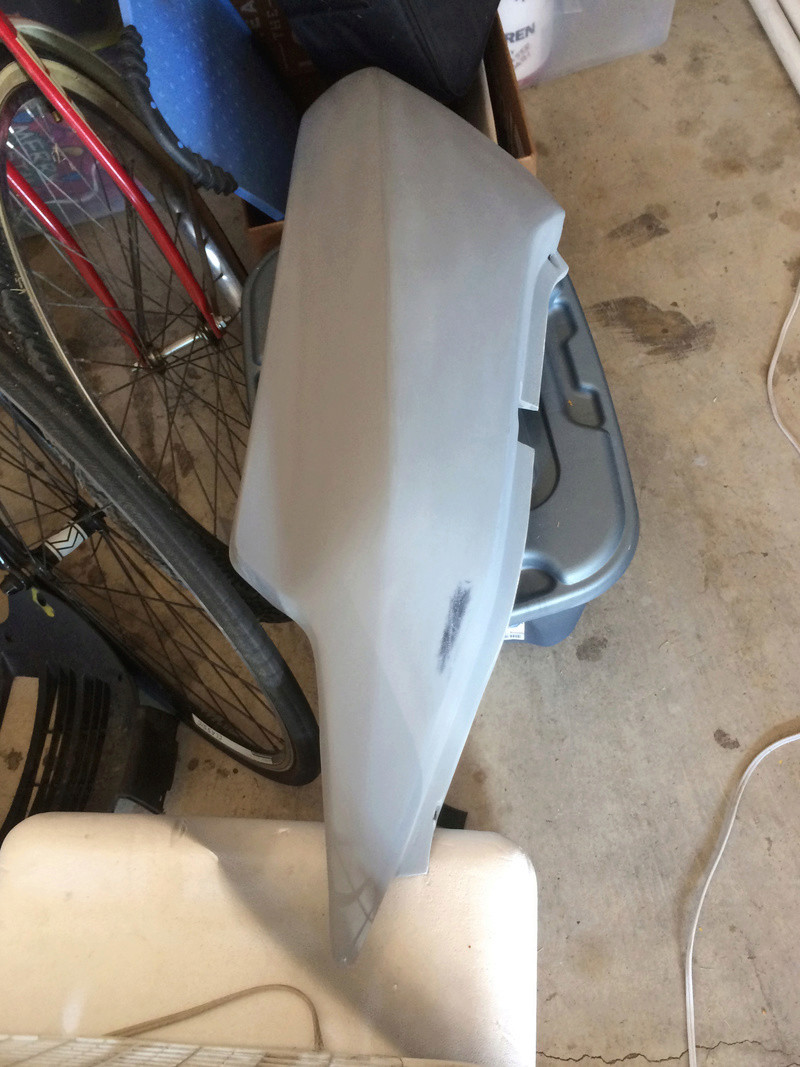 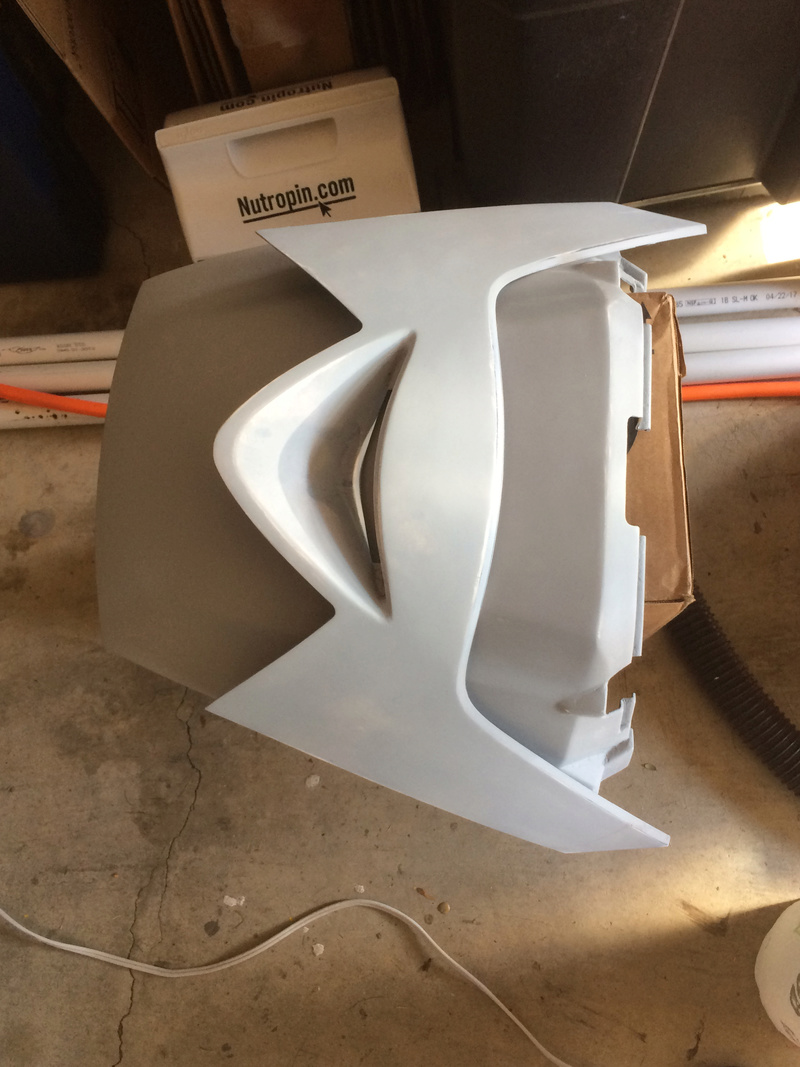 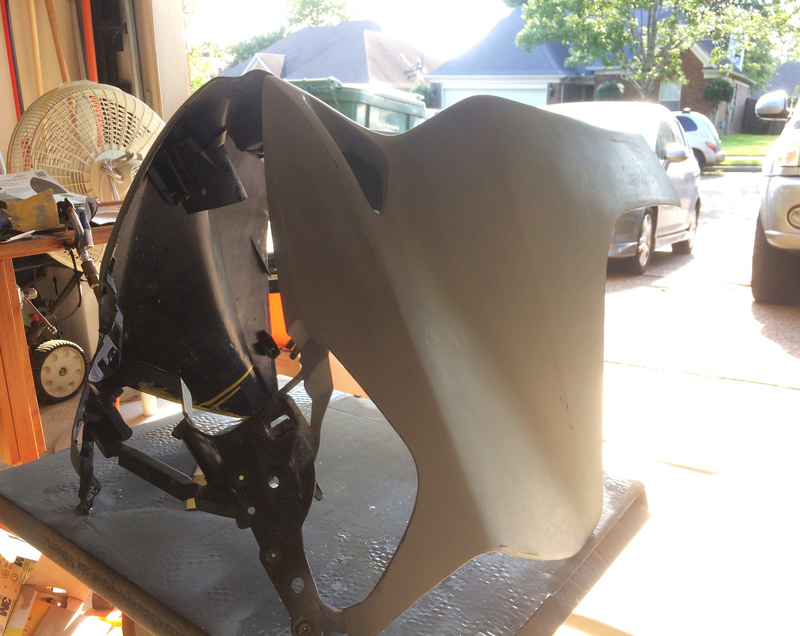 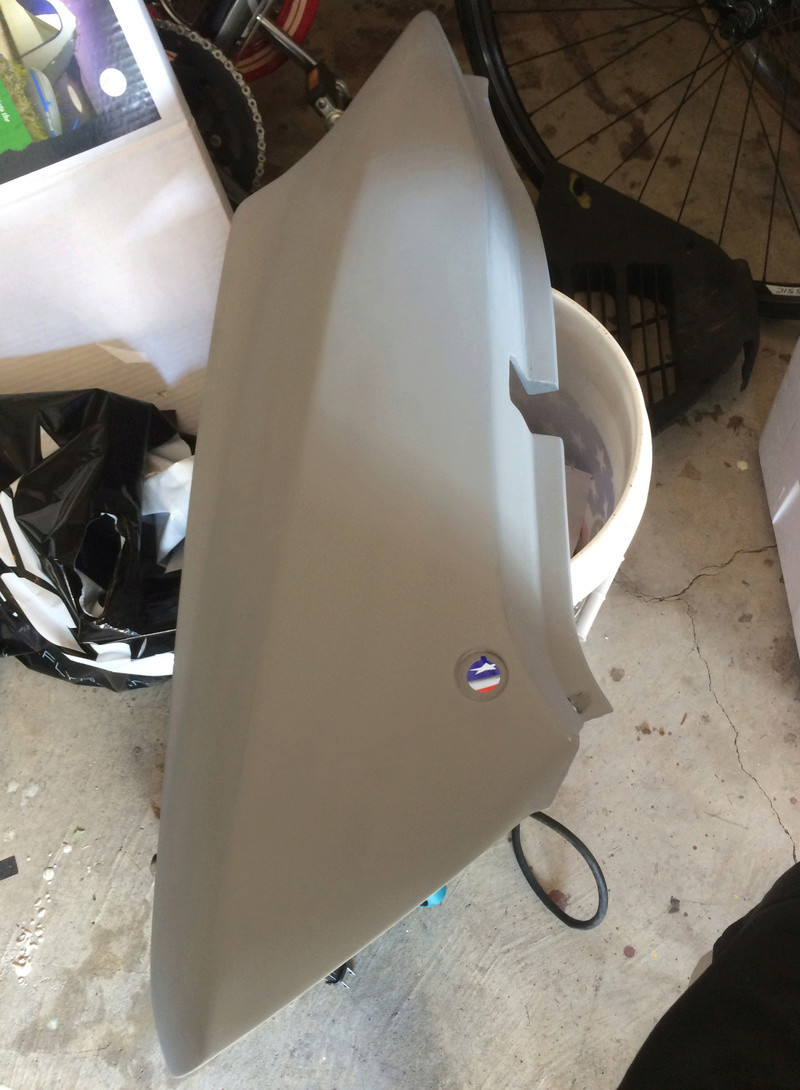 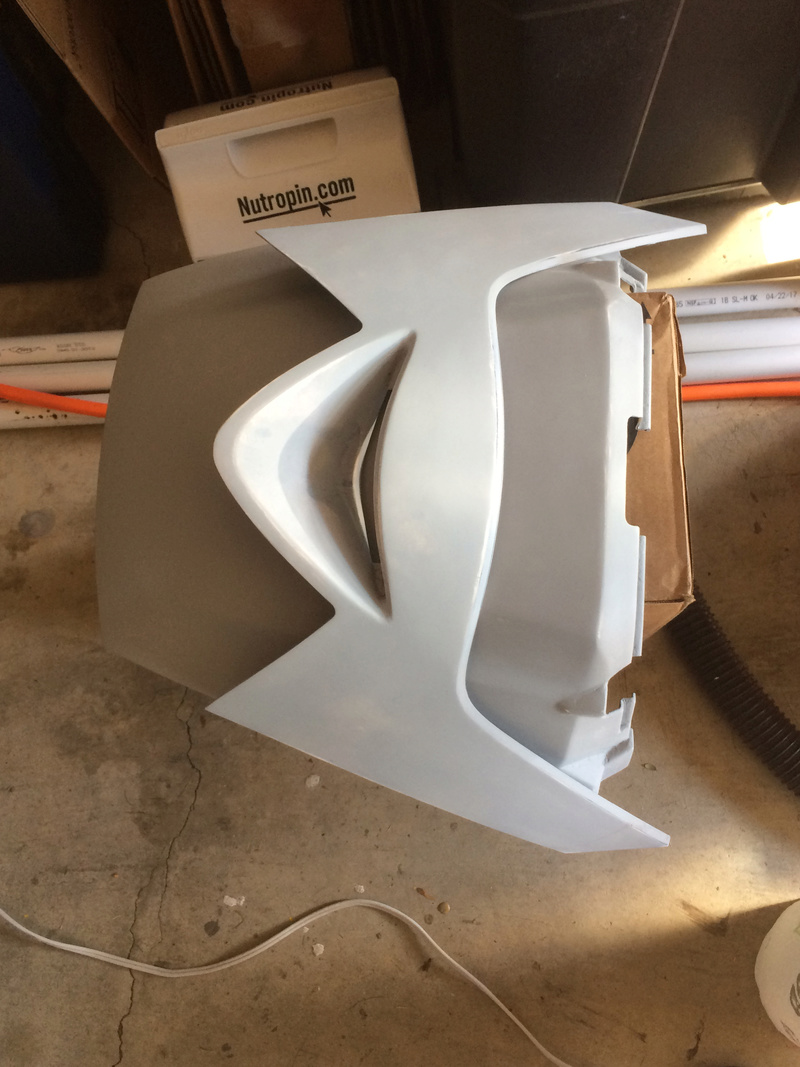 The 06 models have the flat pocket panel dashboard and I wanted to upgrade, so I found someone selling a whole new one for a steal. Got that installed (nothing fancy, these bikes are all the same technically) which youll see on the final photos. I repainted the lower panels and the passenger pegs as well in graphite. 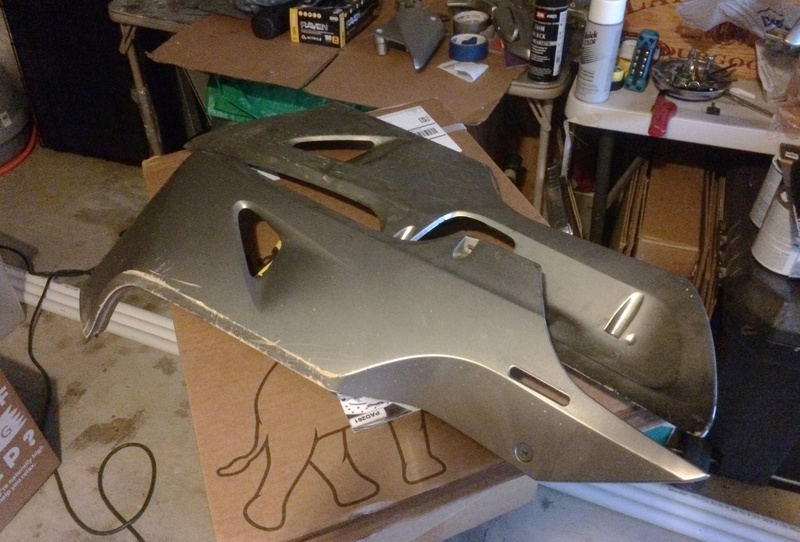 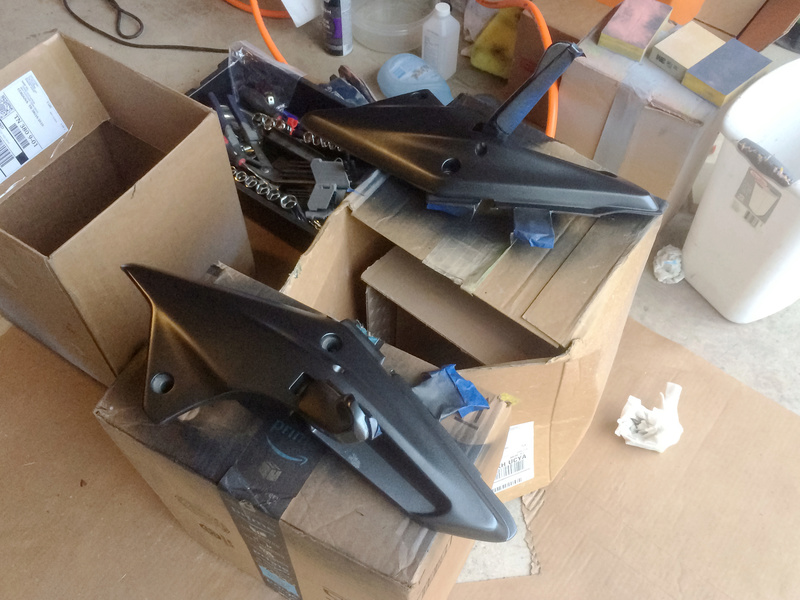 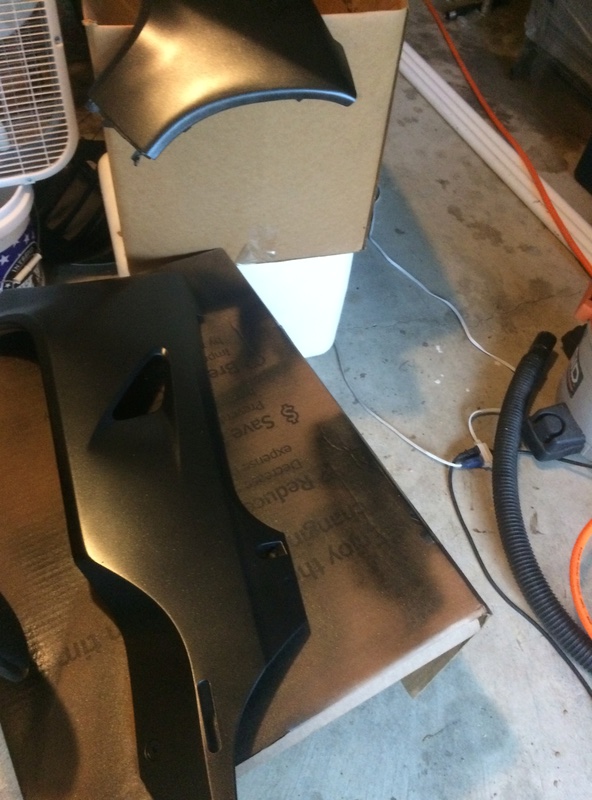 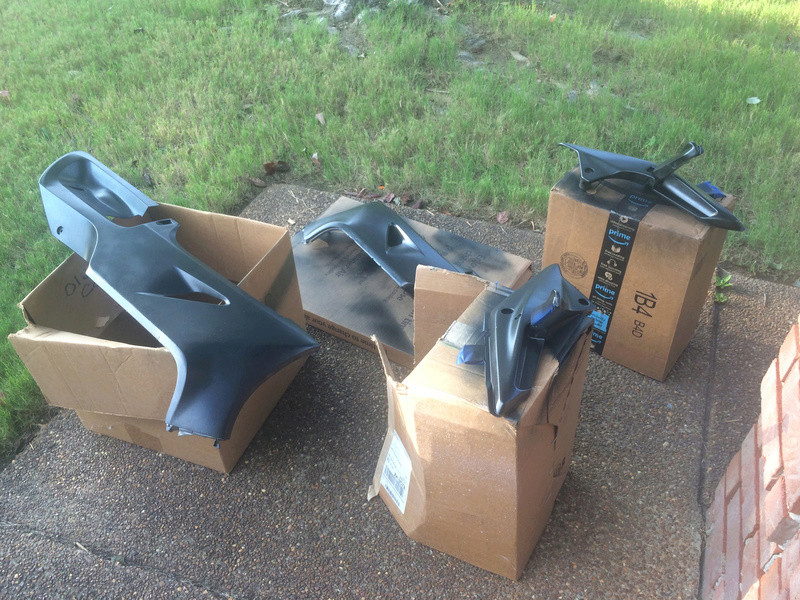 So she was torn down to the core... 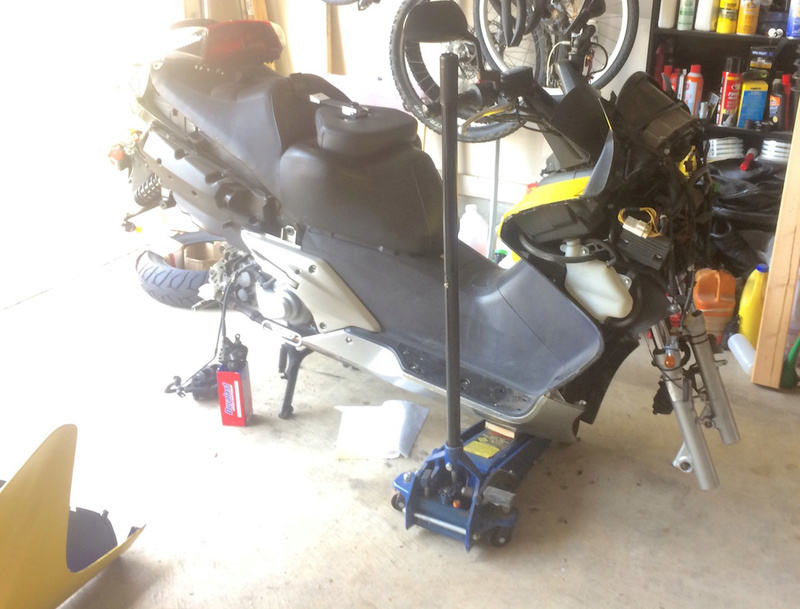 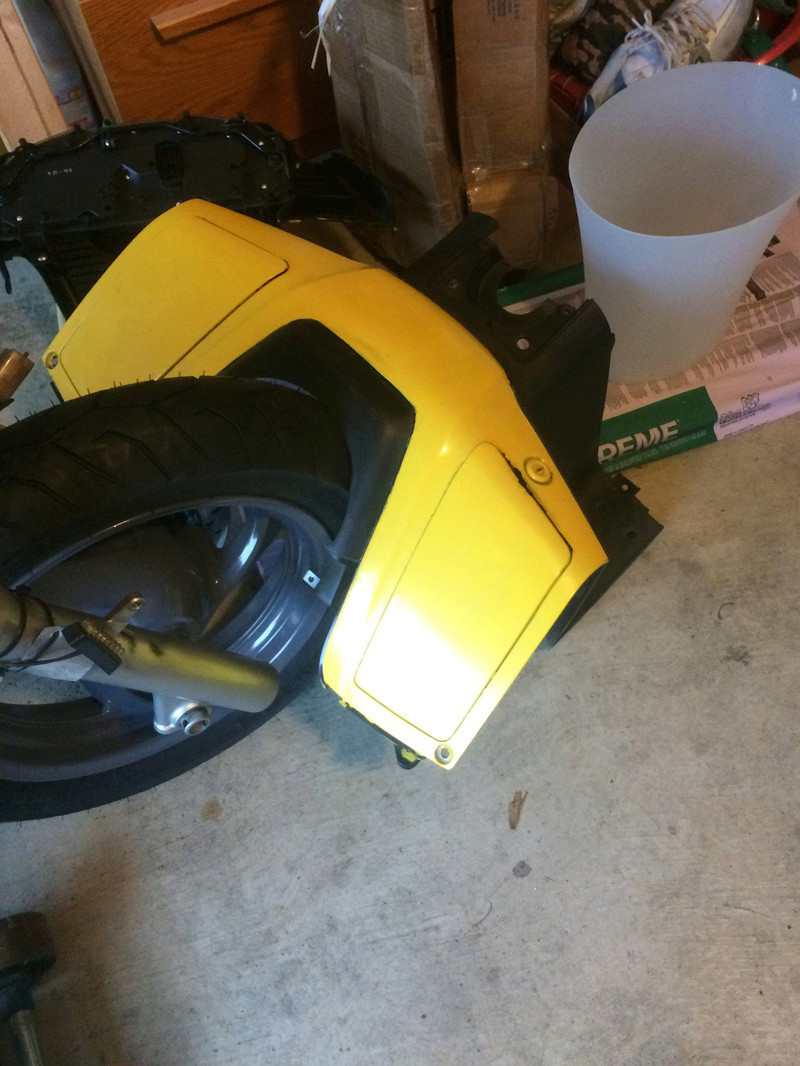   I repainted the entire stepover with a product from Eastman that restores black plastic in 2 stages, a prep and a resin paint, this stuff is amazing on faded black plastic, better than anything on the market in my opinion. I then got to the fun part, setting up a vented painting tent and getting the parts done. All these weeks of prep for what amounts to 20 minutes of painting and a few hours drying... 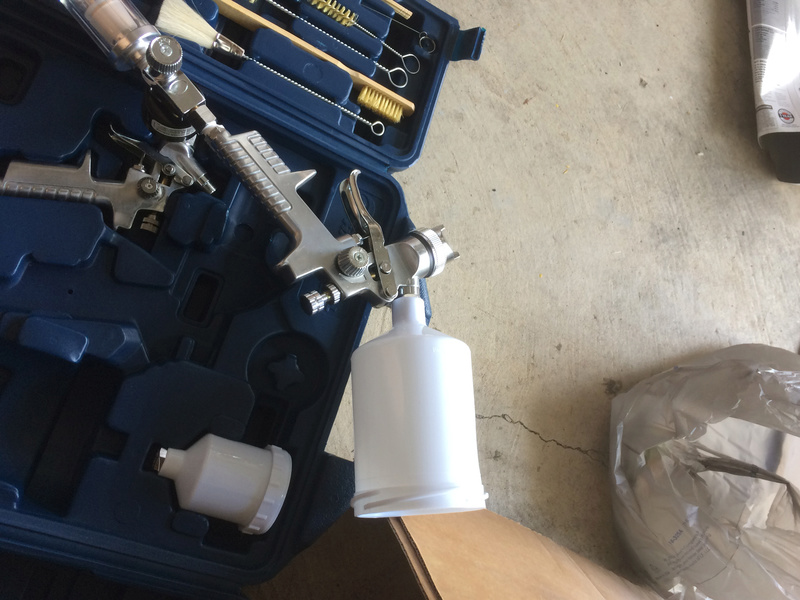 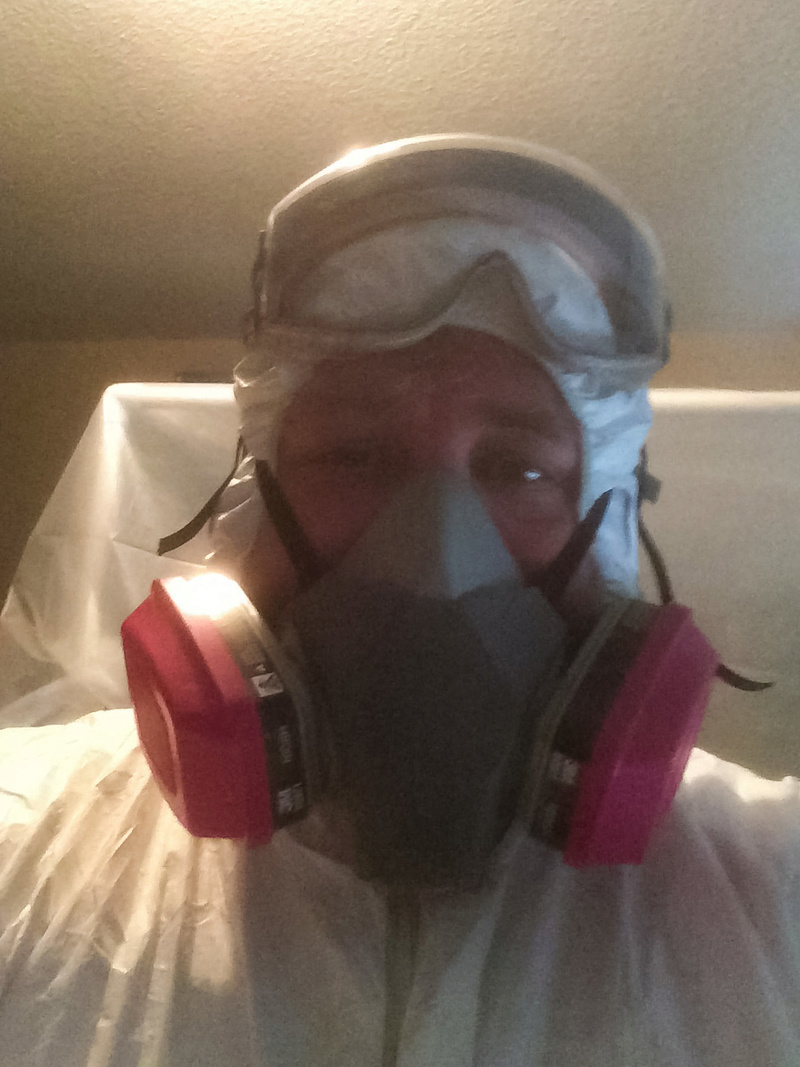 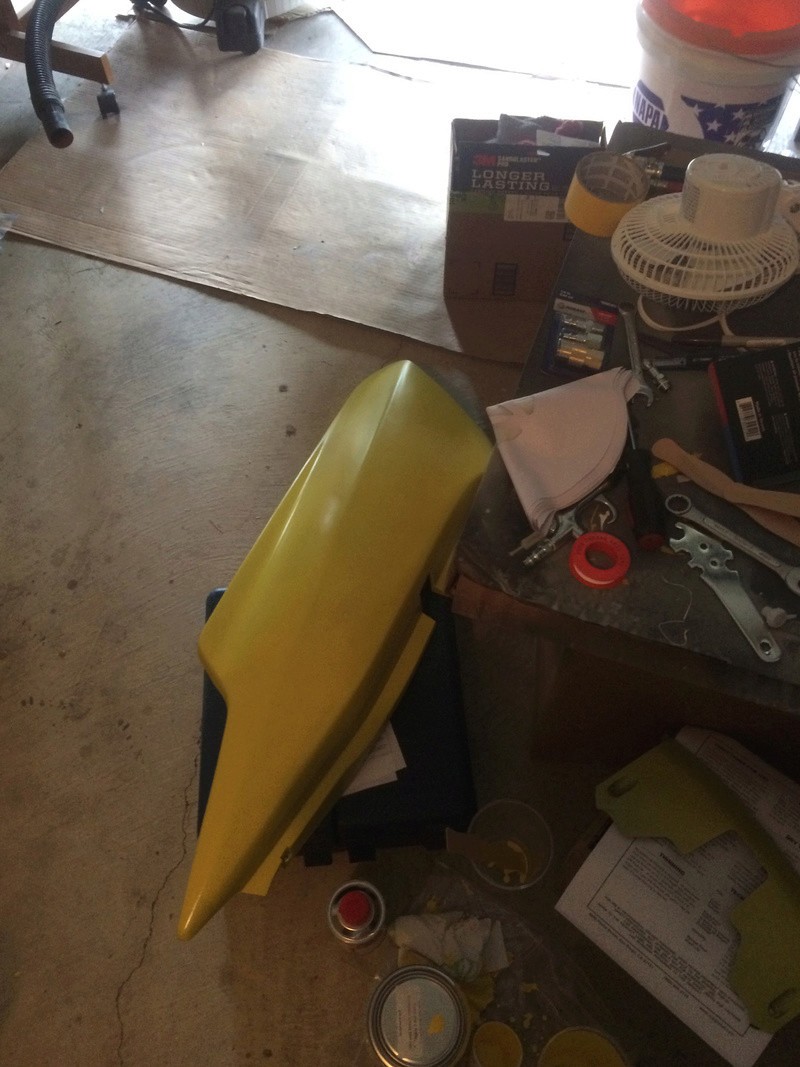 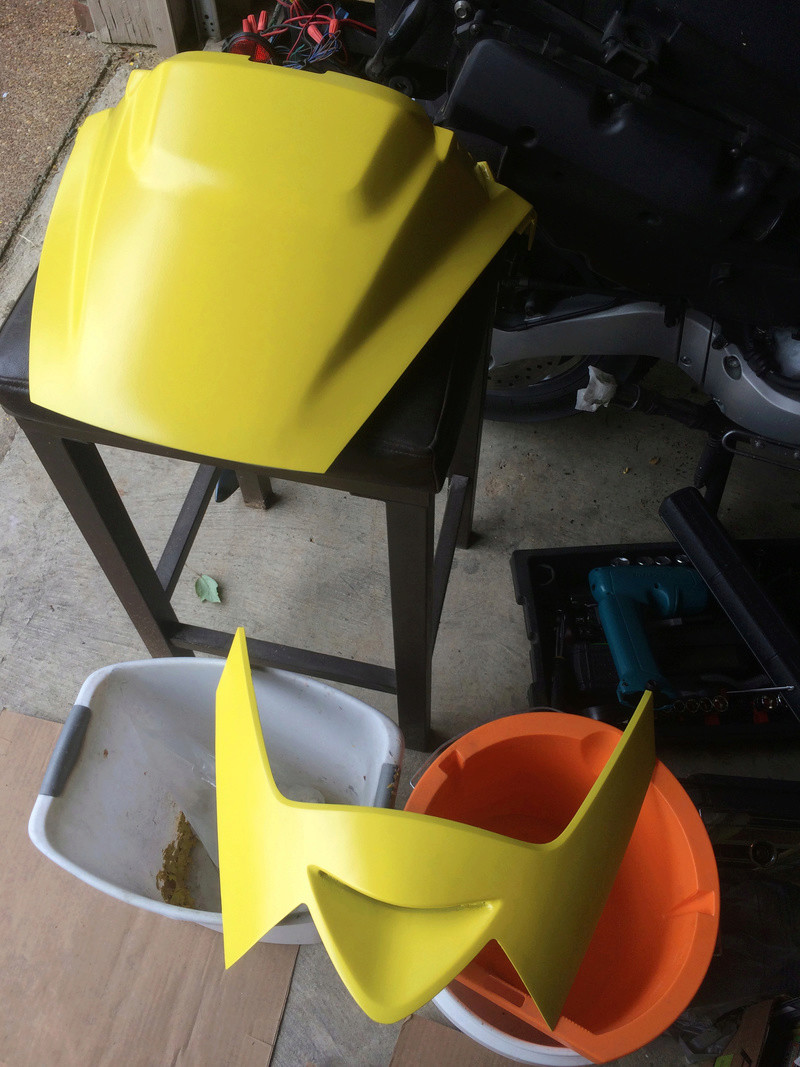 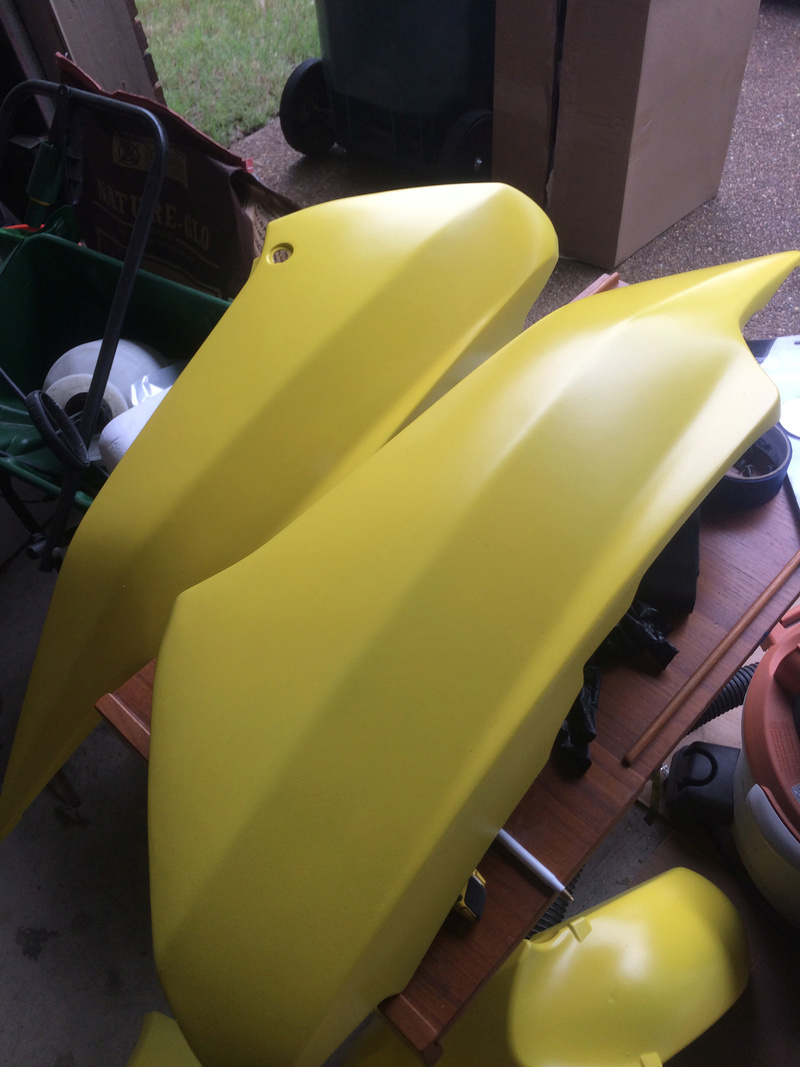 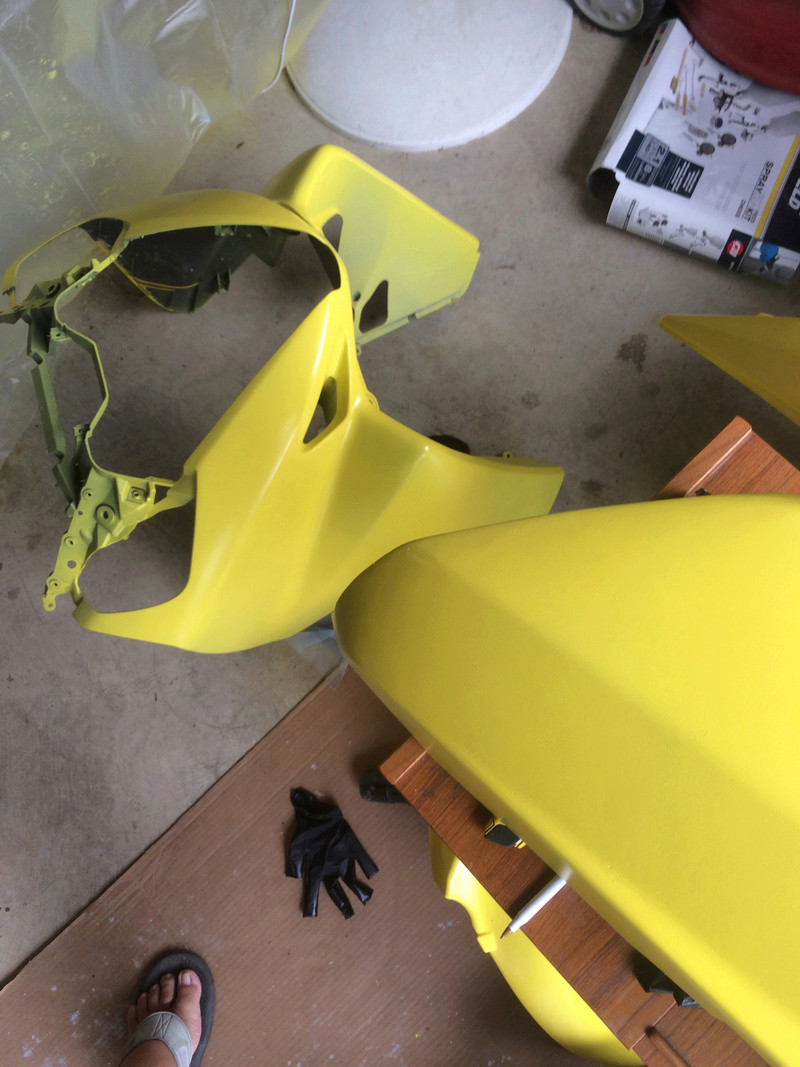 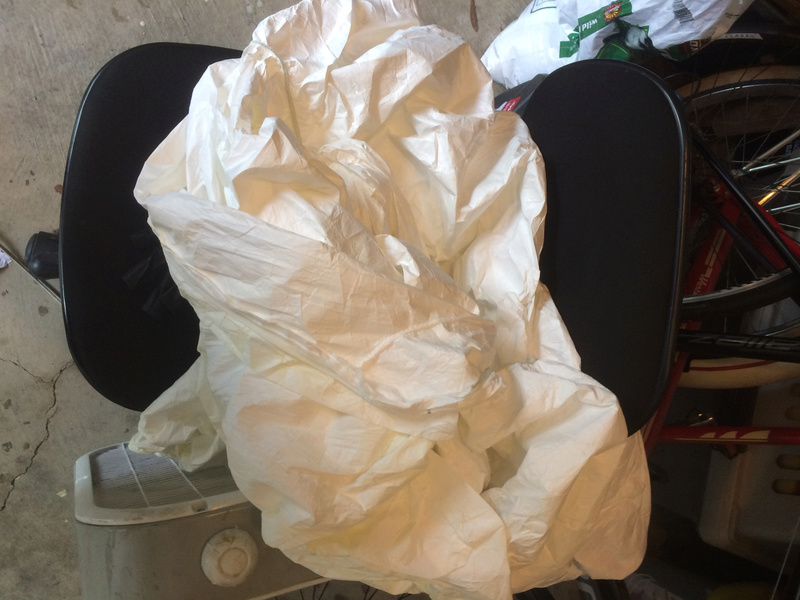 Then it was a matter of installing the panels, the new Givi Airflow as I broke my previous one, putting new Honda Silverwing Decals and stickers on, new brake pads and getting her ready to roll! 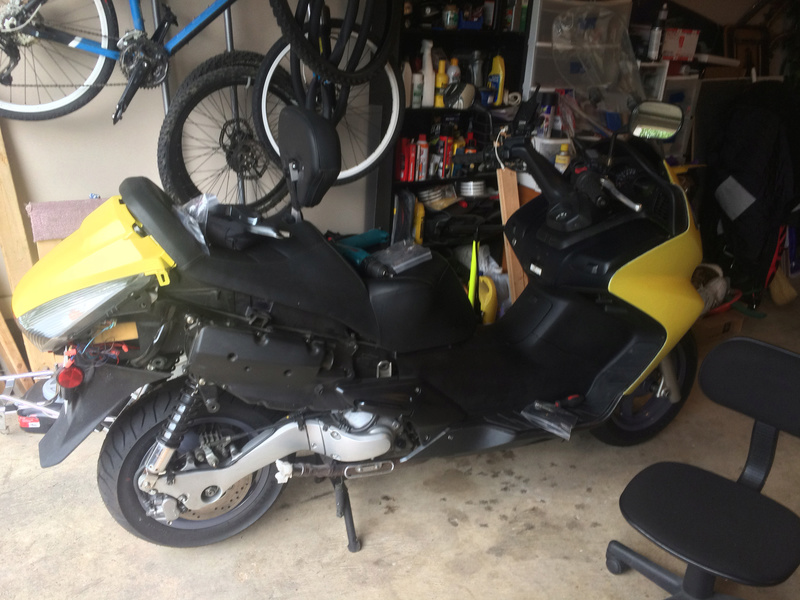 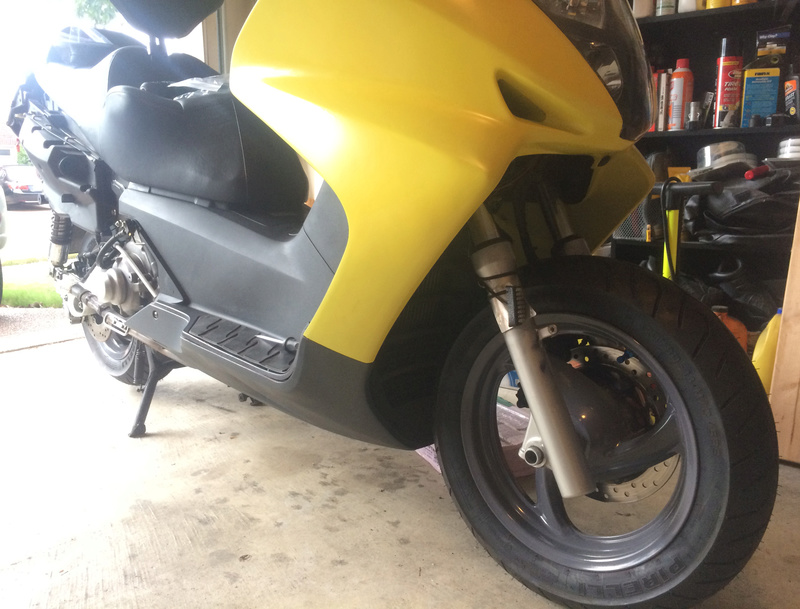 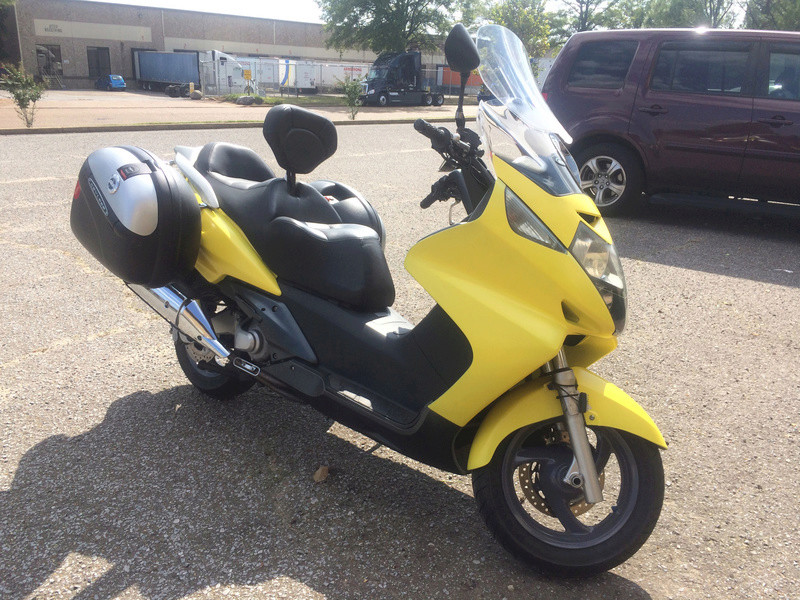 I havent done a proper beauty shoot with the bike yet, you can't see the new decals on the side, but they are there LOL, Im pretty proud of the results and if you have any questions, ask away!
Last edited by Gustafa on Thu Dec 14, 2017 3:48 pm; edited 1 time in total |
|
  | |
Cosmic_Jumper
Site Admin

Number of posts : 4416
Age : 81
Location : damn near Philadelphia, PA
Points : 10630
Registration date : 2009-06-12
 |  Subject: Re: The official long post of the overhaul and repaint of my 06 Silverwing Subject: Re: The official long post of the overhaul and repaint of my 06 Silverwing  Wed Dec 13, 2017 6:51 pm Wed Dec 13, 2017 6:51 pm | |
| |
|
  | |
willajabir
Maxi-Scooter Rider

Number of posts : 161
Location : Birmingham, AL
Points : 4618
Registration date : 2012-08-21
 |  Subject: Re: The official long post of the overhaul and repaint of my 06 Silverwing Subject: Re: The official long post of the overhaul and repaint of my 06 Silverwing  Wed Dec 13, 2017 7:23 pm Wed Dec 13, 2017 7:23 pm | |
| |
|
  | |
Dale N.
Silver Wing Guru


Number of posts : 1992
Age : 78
Location : Princeton, MN
Points : 5950
Registration date : 2014-02-13
 |  Subject: Re: The official long post of the overhaul and repaint of my 06 Silverwing Subject: Re: The official long post of the overhaul and repaint of my 06 Silverwing  Thu Dec 14, 2017 8:04 am Thu Dec 14, 2017 8:04 am | |
| Fantastic Job! You should be proud of your work. It looks great. |
|
  | |
oldwingguy
Silver Wing Guru

Number of posts : 1936
Location : Hocking Hills U.S.A.
Points : 5244
Registration date : 2016-01-29
 |  Subject: Re: The official long post of the overhaul and repaint of my 06 Silverwing Subject: Re: The official long post of the overhaul and repaint of my 06 Silverwing  Thu Dec 14, 2017 8:13 am Thu Dec 14, 2017 8:13 am | |
| Well done, well done indeed, you got the MOST important part of the job spot on, preparation, then paint. Will you share the paint remover name please. Thanks. |
|
  | |
2wheelgal
Scooter Rider

Number of posts : 74
Age : 79
Location : Southeast full time 12/25/17 :)
Points : 2994
Registration date : 2016-08-20
 |  Subject: Re: The official long post of the overhaul and repaint of my 06 Silverwing Subject: Re: The official long post of the overhaul and repaint of my 06 Silverwing  Thu Dec 14, 2017 9:53 am Thu Dec 14, 2017 9:53 am | |
| Fantastic job, beautiful Swing! You are very, very talented!! |
|
  | |
cotetoi
Silver Wing Expert

Number of posts : 757
Location : New Brunswick, Canada
Points : 4946
Registration date : 2013-06-27
 |  Subject: Re: The official long post of the overhaul and repaint of my 06 Silverwing Subject: Re: The official long post of the overhaul and repaint of my 06 Silverwing  Thu Dec 14, 2017 10:21 am Thu Dec 14, 2017 10:21 am | |
| Very nice job. Well done !!!
Jay. |
|
  | |
Mike from NS
Silver Wing Rider


Number of posts : 462
Age : 71
Location : Nova Scotia
Points : 4479
Registration date : 2013-09-12
 |  Subject: Re: The official long post of the overhaul and repaint of my 06 Silverwing Subject: Re: The official long post of the overhaul and repaint of my 06 Silverwing  Thu Dec 14, 2017 12:51 pm Thu Dec 14, 2017 12:51 pm | |
| Gustafa,
What a great job you did. Indeed you should be very proud of the results and all of your patient efforts to get to these results. As our parents and grandparents have always said ... "a job worth doing ---is worth doing well". And you have accomplished that.
Please fill us in with more details as to the spray gun, and what flows and pressures you used or would recommend. It is all a learning curve ... but where might you suggest someone starts that curve.
Well done !
Mike |
|
  | |
bikehiker
Silver Wing Rider

Number of posts : 433
Location : New Cumberland PA
Points : 3064
Registration date : 2017-09-07
 |  Subject: Re: The official long post of the overhaul and repaint of my 06 Silverwing Subject: Re: The official long post of the overhaul and repaint of my 06 Silverwing  Thu Dec 14, 2017 1:55 pm Thu Dec 14, 2017 1:55 pm | |
| Great prep work. Thanks for sending all the pics and great explanation. That yellow is a great standout color--attractive. That one pic of the bubbled up paint on the fender looks like some stylized bikes that I've seen as a finished product.  |
|
  | |
ItBeMe
Maxi-Scooter Rider

Number of posts : 169
Age : 77
Location : Carrollton, GA
Points : 2707
Registration date : 2017-09-29
 |  Subject: Re: The official long post of the overhaul and repaint of my 06 Silverwing Subject: Re: The official long post of the overhaul and repaint of my 06 Silverwing  Thu Dec 14, 2017 2:41 pm Thu Dec 14, 2017 2:41 pm | |
| Looks good. Where did that back rest come from. |
|
  | |
Gustafa
Super Scooter Rider


Number of posts : 218
Location : Cordova, TN
Points : 3482
Registration date : 2015-10-10
 |  Subject: Re: The official long post of the overhaul and repaint of my 06 Silverwing Subject: Re: The official long post of the overhaul and repaint of my 06 Silverwing  Thu Dec 14, 2017 4:02 pm Thu Dec 14, 2017 4:02 pm | |
| Thank you for the kind words - means a lot on this forum.
To answer the question so far:
For the paint remover I used: Permatex Stripper Aerosol (says its safe on plastic) but then moved to Citristrip Aerosol. LET ME SAY THIS - if you have a factory finish, dont strip it. Please dont. Just sand if needed, prime, sand, paint. The finish is so smooth on the factory finish, youre just wasting time, effort and money. I have a couple factory painted parts I did this with and they were gorgeous when repainted.
Paint Gun:
A Campbell-Hausfeld 2 Gun Kit off Amazon. I already owned a 20 Gallon Compressor.
http://amzn.to/2j5xYmC
You need a gun that matches the output of your compressor CFMs and an appropriate length hose.
I am an art director, with plenty of experience airbrushing, so I knew the basics, I figured it would just be on a bigger scale. I watched several YouTube videos on spray gun setup, did a few passes on cardboard, but getting the feel was super easy and getting the gun dialed in went quickly. I can go on, but if you have more questions, just ask.
Mike from NS, theres tons of YouTube videos, but its really easy, just take your time, experiment with water on paper even to dial in the brush pattern and atomizing.
ItBeMe, the backrest came from the entire seat upgrade, from DayLong Motorcycle seats:
https://day-long.com/
Thanks guys! |
|
  | |
ItBeMe
Maxi-Scooter Rider

Number of posts : 169
Age : 77
Location : Carrollton, GA
Points : 2707
Registration date : 2017-09-29
 |  Subject: Re: The official long post of the overhaul and repaint of my 06 Silverwing Subject: Re: The official long post of the overhaul and repaint of my 06 Silverwing  Thu Dec 14, 2017 5:12 pm Thu Dec 14, 2017 5:12 pm | |
| |
|
  | |
sonuvabug
Silver Wing Expert


Number of posts : 930
Location : Mid-Western Ontario Canada
Points : 6078
Registration date : 2010-09-15
 |  Subject: Re: The official long post of the overhaul and repaint of my 06 Silverwing Subject: Re: The official long post of the overhaul and repaint of my 06 Silverwing  Fri Dec 15, 2017 11:43 am Fri Dec 15, 2017 11:43 am | |
| Very well done Gustafa. You brought an older Silver Wing back to glory ... and it looks great. I wish to do the same with my 2005 due to two drops by the previous owner. (both sides badly scratched unfortunately).
You didn't talk about broken tabs and repairing the ABS bits ... maybe you didn't have to do these types of repairs. I do ... so if you can share any details on how you went about it, please do. Again, Congrats on a job very well done. |
|
  | |
Cosmic_Jumper
Site Admin

Number of posts : 4416
Age : 81
Location : damn near Philadelphia, PA
Points : 10630
Registration date : 2009-06-12
 |  Subject: Re: The official long post of the overhaul and repaint of my 06 Silverwing Subject: Re: The official long post of the overhaul and repaint of my 06 Silverwing  Fri Dec 15, 2017 3:49 pm Fri Dec 15, 2017 3:49 pm | |
| - sonuvabug wrote:
- <>You didn't talk about broken tabs and repairing the ABS bits ... maybe you didn't have to do these types of repairs. I do ... so if you can share any details on how you went about it, please do. Again, Congrats on a job very well done.
With out a doubt the best product for repairing ABS body panels is "Plast-aid": https://www.ebay.com/itm/Plast-aid-6oz-Plastic-Pool-Spa-PVC-Plumbing-Part-Repair-Kit-80400/252969565413?epid=1701269695&hash=item3ae6293ce5:g:yEQAAOSwtGlZMKCM Tim |
|
  | |
Pastor Ron
Silver Wing Rider

Number of posts : 400
Age : 72
Location : Asheville,NC
Points : 4654
Registration date : 2013-02-24
 |  Subject: Re: The official long post of the overhaul and repaint of my 06 Silverwing Subject: Re: The official long post of the overhaul and repaint of my 06 Silverwing  Fri Dec 15, 2017 8:03 pm Fri Dec 15, 2017 8:03 pm | |
| A job very well done. Thank you for sharing. |
|
  | |
bandito2
Maxi-Scooter Rider

Number of posts : 181
Location : Somewhere outside of the box
Points : 5427
Registration date : 2010-04-04
 |  Subject: Re: The official long post of the overhaul and repaint of my 06 Silverwing Subject: Re: The official long post of the overhaul and repaint of my 06 Silverwing  Fri Dec 15, 2017 8:58 pm Fri Dec 15, 2017 8:58 pm | |
| That Plastaid stuff seems a lot like some plastic repair stuff I got once (PLASTEX) and used on one of my Reflex scooters. Seems to be a whole lot more repair material in the Plastaid kit which would be good if you needed to do a lot of repairs or rebuild more and larger parts. The Plastex kit had less repair powder and solvent but It came with a rubber like piece that could be softened up with hot water to form it into a mold and stiffened when cool... Worked great for duplicating tabs right on the bike. It was easy to sand and shape and took paint just fine. (the solvent stinks pretty bad though and needed good ventilation)
Great job you did on your bike BTW. |
|
  | |
Modernman1953
Touring Scooter Rider

Number of posts : 379
Location : Yuma, AZ
Points : 3404
Registration date : 2016-06-01
 |  Subject: Re: The official long post of the overhaul and repaint of my 06 Silverwing Subject: Re: The official long post of the overhaul and repaint of my 06 Silverwing  Sat Dec 16, 2017 4:48 pm Sat Dec 16, 2017 4:48 pm | |
| I have a "need to know" about the saddle bags and brackets. Can you help me out on that?
Great job by the way. |
|
  | |
Dale N.
Silver Wing Guru


Number of posts : 1992
Age : 78
Location : Princeton, MN
Points : 5950
Registration date : 2014-02-13
 |  Subject: Re: The official long post of the overhaul and repaint of my 06 Silverwing Subject: Re: The official long post of the overhaul and repaint of my 06 Silverwing  Sat Dec 16, 2017 11:32 pm Sat Dec 16, 2017 11:32 pm | |
| Saddle Bags and Brackets would be a nice addition. |
|
  | |
Mike from NS
Silver Wing Rider


Number of posts : 462
Age : 71
Location : Nova Scotia
Points : 4479
Registration date : 2013-09-12
 |  Subject: Re: The official long post of the overhaul and repaint of my 06 Silverwing Subject: Re: The official long post of the overhaul and repaint of my 06 Silverwing  Sun Dec 17, 2017 6:28 am Sun Dec 17, 2017 6:28 am | |
| Thanks for the replies to the questions, Gustafa. In basic .... patient practice and study to gain some experience. Wise words indeed. Good info for the uninitiated.
Maybe you will airbrush some designs on the bike, now that you have a perfect "canvas" to do so?
Mike |
|
  | |
Gustafa
Super Scooter Rider


Number of posts : 218
Location : Cordova, TN
Points : 3482
Registration date : 2015-10-10
 |  Subject: Re: The official long post of the overhaul and repaint of my 06 Silverwing Subject: Re: The official long post of the overhaul and repaint of my 06 Silverwing  Mon Dec 18, 2017 9:23 am Mon Dec 18, 2017 9:23 am | |
| - sonuvabug wrote:
- Very well done Gustafa. You brought an older Silver Wing back to glory ... and it looks great. I wish to do the same with my 2005 due to two drops by the previous owner. (both sides badly scratched unfortunately).
You didn't talk about broken tabs and repairing the ABS bits ... maybe you didn't have to do these types of repairs. I do ... so if you can share any details on how you went about it, please do. Again, Congrats on a job very well done. I did deal with some broken tabs in places and like Cosmic Jumper recommended, I used Plast-Aid. Its plastic in powder form in one bottle and a MEK type liquid in another. Very strong stuff, wear a mask. In most cases I had snapped tabs that were hanging on, not completely broken off and on others, they were snapped off and still attached to a screw. In both cases, I set them with super glue and built up thing walls where I could with the Plast-Aid. You mix it in a cup and have a suuuuper short work time with it, but its as strong as ejected plastic when dry. Took a bit of learning, but nothing you couldn't get. OH and wear gloves with it too. As for the saddle bags, they are just standard Givi monokey line bags, its the bracket thats all the fun. It came with the bike and the place the previous owner purchased the rack from no longer makes them, unfortunately. As for any airbrushing, I had pondered a Boba Fett paint scheme, but for now, shes just going to stay a blank canvas. |
|
  | |
andyman
Scooter Rider

Number of posts : 67
Location : Charlotte NC
Points : 5461
Registration date : 2009-10-28
 |  Subject: Re: The official long post of the overhaul and repaint of my 06 Silverwing Subject: Re: The official long post of the overhaul and repaint of my 06 Silverwing  Mon Dec 18, 2017 9:32 pm Mon Dec 18, 2017 9:32 pm | |
| - Gustafa wrote:
- LET ME SAY THIS - if you have a factory finish, dont strip it. Please dont. Just sand if needed, prime, sand, paint. The finish is so smooth on the factory finish, youre just wasting time, effort and money. I have a couple factory painted parts I did this with and they were gorgeous when repainted.
I just got done painting my silverwing and ended up stripping several panels because the paint I was spraying would react with the factory paint. The odd thing was that it would only react on a second coat, so if I didn't get the spray to cover in the initial recoat window and let it sit 48+ hours, the paint would wrinkle. Ended up stripping the nose and front fender to get it looking ok. I didn't spend near the time here on prep work and also chose to rattle can acrylic enamel instead of setting up a booth in the garage because I was in a hurry. Mine looks good from 10 feet, but it's a 15 year old bike with over 50k miles on it, no longer a gem that needs special care. Gotta say yours turned out quite nice. Good work. |
|
  | |
Gustafa
Super Scooter Rider


Number of posts : 218
Location : Cordova, TN
Points : 3482
Registration date : 2015-10-10
 |  Subject: Re: The official long post of the overhaul and repaint of my 06 Silverwing Subject: Re: The official long post of the overhaul and repaint of my 06 Silverwing  Tue Dec 19, 2017 10:06 am Tue Dec 19, 2017 10:06 am | |
| - andyman wrote:
- Gustafa wrote:
- LET ME SAY THIS - if you have a factory finish, dont strip it. Please dont. Just sand if needed, prime, sand, paint. The finish is so smooth on the factory finish, youre just wasting time, effort and money. I have a couple factory painted parts I did this with and they were gorgeous when repainted.
I just got done painting my silverwing and ended up stripping several panels because the paint I was spraying would react with the factory paint. The odd thing was that it would only react on a second coat, so if I didn't get the spray to cover in the initial recoat window and let it sit 48+ hours, the paint would wrinkle. Ended up stripping the nose and front fender to get it looking ok. I didn't spend near the time here on prep work and also chose to rattle can acrylic enamel instead of setting up a booth in the garage because I was in a hurry. Mine looks good from 10 feet, but it's a 15 year old bike with over 50k miles on it, no longer a gem that needs special care.
Gotta say yours turned out quite nice. Good work. Yea, let me clarify - you still have to prime the factory finish before painting, I dont suggest painting right over it. 600 grit wet sand them, hit them with a primer, let it dry thoroughly, hit that with 600 and 1000 grit wet sands, you will have a gorgeous base to paint on. The 10 foot rule works in a lot of places in life. Youll find issues and stuff on mine even with this route I did. |
|
  | |
oldwingguy
Silver Wing Guru

Number of posts : 1936
Location : Hocking Hills U.S.A.
Points : 5244
Registration date : 2016-01-29
 |  Subject: Re: The official long post of the overhaul and repaint of my 06 Silverwing Subject: Re: The official long post of the overhaul and repaint of my 06 Silverwing  Wed Dec 20, 2017 8:48 am Wed Dec 20, 2017 8:48 am | |
| Yea, let me clarify - you still have to prime the factory finish before painting, I dont suggest painting right over it. 600 grit wet sand them, hit them with a primer, let it dry thoroughly, hit that with 600 and 1000 grit wet sands, you will have a gorgeous base to paint on.
The 10 foot rule works in a lot of places in life. Youll find issues and stuff on mine even with this route I did.
<<>> remembering the old days of lacquer painting, clean, sand, clean, paint, repeat as often as need to get a mirror like finish, then hope someone doesn't mess it up in the first week on the road. |
|
  | |
| | The official long post of the overhaul and repaint of my 06 Silverwing |  |
|
