| | | HID retrofit |  |
| | | Author | Message |
|---|
andyman
Scooter Rider

Number of posts : 67
Location : Charlotte NC
Points : 5369
Registration date : 2009-10-28
 |  Subject: HID retrofit Subject: HID retrofit  Fri Mar 23, 2012 12:18 pm Fri Mar 23, 2012 12:18 pm | |
| I hadn't seen any discussions yet about upgrading headlights, so I thought I'd post my latest project in hopes that it may inspire others. I started out wanting more low beam light on the silverwing. I bought a silverstar bulb which helped but still lacked enough light to be safe at night. I then started thinking about getting an HID bulb to replace the halogen. That provided enough light but I feared I was blinding other people since it was using the stock reflector in a manner for which it wasn't designed. The light scattered everywhere, not just down. I was illuminating everything too well. The final thing I did in my attempt to get more light is to install a projector bulb into the stock headlight. It was much easier than I originally thought and turned out very nice looking. There is plenty of light and since the projector is a 'bi-xenon' setup, my high beam is extremely bright :-) If anyone is interested in the details of this setup I could share more, but for now I'll post some of my bad cell phone pics of what it looks like. The first one is my garage door with the cutoff pattern as I was adjusting the height of the beam and the second one is what the headlight looks like at night. 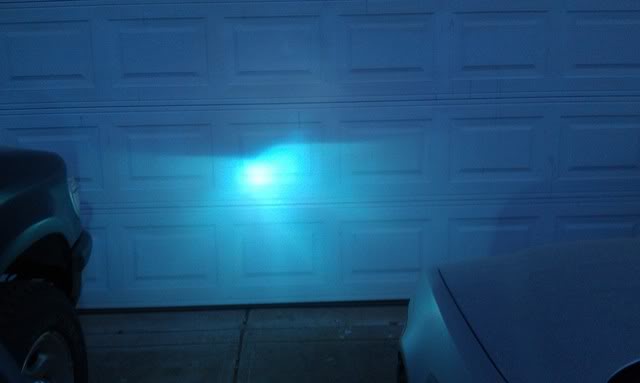 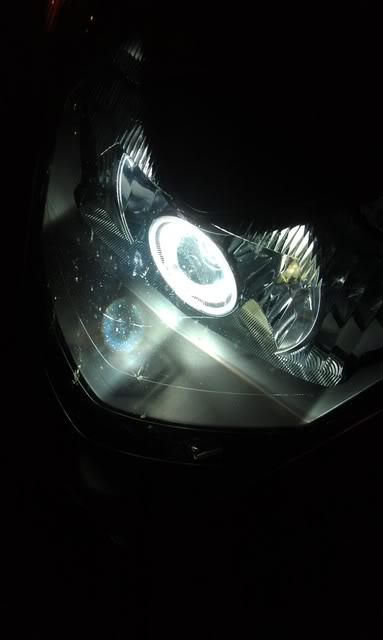 |
|  | | DickO
Founding Member

Number of posts : 1018
Age : 79
Location : Atchison, KS
Points : 6752
Registration date : 2008-12-23
| | Subject: Re: HID retrofit Fri Mar 23, 2012 9:08 pm | |
| |
| | | | andyman
Scooter Rider
Number of posts : 67
Location : Charlotte NC
Points : 5369
Registration date : 2009-10-28
| | Subject: Re: HID retrofit Sat Mar 24, 2012 8:57 am | |
| Ok, I'll add more details about how I got this installed...
The projector was purchased on ebay. There are many sellers selling similar imported kits. Most of them are the same thing, mine was $50 without the ballast, but complete kits with ballasts can be had for $60. link Another important consideration is the color of the light. I bought one that has a 6k bulb. If I had it to do over, I'd get a bulb in the 4.5k-5k range, and the next time I remove my tupperware I will most likely switch the bulb to a lower intensity one. This is due to personal preference. My light has a slightly blue hue when compared to other yellower lights out on the road and I prefer white. If you don't already have a ballast, get a kit with one, it's just easier and cheaper to get the kit together. Also, I only used a 35 watt ballast because some of the projector kits warn against using a 55 watt ballast. I believe this is due to heat but am unsure, try at your own risk.
The kits also all have angel eyes. These are CCFL tubes that surround the outside edge of the projector and give them different color hues. This may be some people's cup of tea, but not mine. My kit came with a red and blue CCFL ring, but since I thought a jerky police officer may have issues with red and blue lights on the front of the scooter, I decided to pull the bulbs out. This also makes the install easier since I wouldn't need to add another circuit to run the CCFL bulbs.
Now that I've written a novel about HIDs, I'll get on to the install...
First thing is you have to remove the headlight assembly, which means removing the front tupperware. This to me was the hardest part of the install, but I have a service manual and following the instructions the first time removing the covers really helps. Once the headlight assembly is removed from the tupperware and the bulbs are removed from the headlight, I removed the lens.
The next part to me was the scariest unknown. The lens has to come off of the headlight. It is glued together and didn't want to budge when I attempted to pry it apart. The way I ended up getting it apart is to use heat. I baked the headlight in the oven at 170 (the lowest my oven would go) for about 5 minutes. I got the whole assembly hot until it was uncomfortable to the touch yet not too hot that I couldn't work with it.
With the headlight assembly apart, I started fitting the projector. The projector itself screwed in place of the bulb and fit very nicely. The only modification I had to do was to drill a hole for wires. The bulb has a relay that switches a solenoid for the high beam flap, the wire comes out the side of the projector assembly. Before drilling the hole, power up the projector to be sure the rotation is correct. The flap will actually be on the bottom of the projector. Be sure the rotation is correct before reassembling the headlight.
To reinstall the lens, I enlisted the use of the oven again. I set the lens in place and baked it for 5 minutes at 170 to soften the glue and help seal the seam. I pulled it out of the oven, pressed the assembly together and let it cool. Once cool, the rest of the mechanical assembly is the reverse of removal. The electrical install isn't as bad as one may think, I used the low beam power leads to power the HID assembly. I also spliced the relay that controls the high beam flap to the high beam power wire. Once the ballast and relay were all wired up, I used double sided tape and zip ties to secure all the wires to the back of the headlight. I reinstalled the tupperware and pointed the headlight so I'm not blinding anyone and went for a test ride. Be sure in pointing the light that the beam is less than parallel to the road. Mark on a garage door the level of the cutoff line, back the bike up and the light should be below the mark.
I believe this sums up the install. I meant to take some more pictures of the wiring and assembly but got wrapped up in the install and before I knew it I was done. I'll be pulling the tupperware off again in a few months for my next project and may snap some pics then. |
| | | | Cosmic_Jumper
Site Admin

Number of posts : 4416
Age : 81
Location : damn near Philadelphia, PA
Points : 10538
Registration date : 2009-06-12
| | Subject: Re: HID retrofit Sat Mar 24, 2012 9:47 pm | |
| Isn't the Projector assembly in some sort of a can-type housing? If so, how does that can attach to the reflector? If the design is something else, how does that work?
Any links you can send that may show the parts and give us some ideas? Please |
| | | | Cosmic_Jumper
Site Admin
Number of posts : 4416
Age : 81
Location : damn near Philadelphia, PA
Points : 10538
Registration date : 2009-06-12
| | Subject: Re: HID retrofit Sun Apr 08, 2012 11:54 am | |
| Andy
Checking out your link to the HID Projector lamp kit it appears that there is only one headlight per kit. Is that so? How do you get the high beam "shutter" HID set up?
While your post doesn't seem to indicate it, did you use two kits to do your job?
Tim |
| | | | andyman
Scooter Rider
Number of posts : 67
Location : Charlotte NC
Points : 5369
Registration date : 2009-10-28
| | Subject: Re: HID retrofit Tue Apr 10, 2012 8:45 pm | |
| Sorry for the long delay in uploading a pic of the back of the light. This is my busy season at work and I've been working 6-7 days a week. I took a picture of the lights I installed in my uncle's car since I didn't want to take my scoot apart just to snap a missing picture. The lights are the same concept as the one I bought, but it appears to be a later design. That being said, function being the same, the packaging and light emitted are better than the one I installed. The designation of mine was a 'g1' and the one I liked better was a 'g3'. Wiring and installation is the same for either. They are sold as units, so if you wanted to replace your high beam bulb as well then you'd need 2 of them. You also would want to run a dedicated power line to the battery to power a pair of them. I used the low beam factory wire to power mine since there was just one.  The high beam is a flap which is controlled by splicing into the high beam power wire. This is what's called a 'bi-xenon' type of light since it's both the low and high beam in one unit. If I had it to do over again I'd install 2, and when I do something else that requires disassembly I most likely will do that. Recently I installed a H7 replacement HID bulb in the high beam and that coupled with the projector's high beam, I am putting out a serious amount of night time light. |
| | | | Cosmic_Jumper
Site Admin
Number of posts : 4416
Age : 81
Location : damn near Philadelphia, PA
Points : 10538
Registration date : 2009-06-12
| | Subject: Re: HID retrofit Tue Apr 10, 2012 10:32 pm | |
| Am I correct in assuming that the "bi-xenon" HID headlight is both low beam as well as the high beam (when the shutter is dropped open)?
And if the stock high beam bulb is replaced with a 2nd bi-xenon HID then you would, effectively, have two high beams --assuming that the shutters would be wired to open when the High Beam switch were activated. And you would also have the low beam circuit wired to both HIDs, so that you also had two low beams ON all the time?
Tim |
| | | | andyman
Scooter Rider
Number of posts : 67
Location : Charlotte NC
Points : 5369
Registration date : 2009-10-28
| | Subject: Re: HID retrofit Wed Apr 11, 2012 7:01 am | |
| you are correct. 2 low and 2 high beams. That's what I'm going to do if I take it apart again. |
| | | | Sponsored content
| | Subject: Re: HID retrofit | |
| |
| | | | | | HID retrofit | |
|
Similar topics |  |
|
| | Permissions in this forum: | You cannot reply to topics in this forum
| |
| |
| |


